Friday, December 19, 2014

Last Minute Holiday Recipes

Is it just me or did this year fly by? I just can't believe that Christmas is less than a week away! As you finalize your dishes for your holiday table, I would like to share a couple that I created for Thanksgiving that would translate well for events through the rest of the month! The Apple Cider Sangria is a great drink for a crowd and doesn't involve too many specialty (or unnaturally flavored) ingredients like many of the other recipes I encountered. The Pumpkin Cornbread Stuffing Bites were just the right about of sweet and savory to accompany a traditional or non-traditional holiday meal. They would also be great on a appetizer buffet! Please excuse the photos as always. These items are much more beautiful in real life! Enjoy!


Apple Cider Sangria

6 cups Trader Joe’s Pear Cinnamon Cider (If you can't find this particular cider, I would recommend adding some pear juice to your traditional cider as well as some cinnamon. Mix to taste.)
1 cup Captain Morgan’s Spiced Rum
1/2 cup Patron Citronage (or another orange flavored liquor)
2 apples (I used Sweet Tango), chopped
2 Bosc pears, chopped
1 orange, chopped
1 bottle Sauvignon Blanc

1. In a large bowl sealable bowl, combine the cider, rum, and Citronage.
2. Add chopped fruit to cider and alcohol mixture. Stir well.
3. Seal and refrigerate for at least 3 hours though overnight is recommended.
4. Prior to serving, mix in 1 bottle of Sauvignon Blanc.
5. Serve in a punchbowl or a pitcher. Make sure each glass gets some of the delicious fruit in it!


Pumpkin Cornbread Stuffing Bites

4 cups Trader Joe’s Pumpkin Cornbread Croutons (Can't find these croutons? You can try regular cornbread croutons with some pumpkin pie spice.)
4 slices of bacon, chopped/crumbled (more if you want to amp up the bacon flavor, this can also be left out to make it vegetarian)
½ cup chopped shallots
2 tablespoons unsalted butter, browned
2 cups chicken broth (vegetable broth can be substituted, if you prefer a slightly more moist stuffing, you may want to consider adding another 1/2 cup broth)
¼ cup fresh sage, chopped

1. Pre-heat the oven 350.
2. Brown the unsalted butter in a 12 inch skillet (directions for creating browned butter can be found online).
3. As the butter starts to foam and brown, add the shallots so that as the butter finishes the shallots will get a quick saute.
4. Add the crumbled bacon, sage and broth. Heat to boiling.
5. Remove from heat and fold in the croutons and mix well.
6. Spray mini muffin tins with cooking spray.
7. Make small balls out of the stuffing mix and place one into each slot in the mini muffin tin.
8. Bake for 20-25 minutes until tops are crispy and the bites are set. This made exactly 2 dozen bites!

Notes: I prepped the stuffing mix earlier in the day and didn't bake for several hours and had no problems. They were a little crumbly but that didn't bother me. As mentioned above, you may wish to include a little more liquid of some egg to help bind it.


Wednesday, June 11, 2014

Product Placement Wednesday - Vaseline Spray & Go Moisturizer

Today I bring back Product Placement Wednesday to share a great product that is PERFECT for summer! 


I will confess - my skin is under moisturized. I am usually in a hurry to get ready and don't have the time to wait for a heavy lotion to soak in before getting dressed. Plus in the summer who wants the weight of a thick moisturizer sitting on their skin? I live in California - it's summer here more than it isn't! Recently a friend was doing a promotion for this product and offered me a bottle as a sample. I had high expectations but this product has exceeded them. Application is simple - spray on the areas you would like to moisturize (it sprays upside down too so you can even reach your own back!) and then quickly rub the product to make sure it absorbs properly. Personally I like to apply and then brush my teeth. By the time I'm done, the Spray & Go is fully absorbed! There are three types - Total Moisture, Cocoa Radiant (with cocoa butter), and Aloe Fresh. So far I have only tried the Total Moisture but envision the Aloe Fresh to be perfect after a day in the sun - especially if you keep it in the fridge! 

This week Vaseline Spray & Go is on sale at Target! What better way to kick off summer than with freshly moisturized skin at a discount price! 


Sunday, April 27, 2014

Angel Food Cupcakes - 2 Ways with 1 Box of Mix!

I'm back! I have been MIA for so long due to a wrist sprain (of course when that finally healed work/life got busy!) but my wrist is more or less better and I'm so excited to share this fabulous recipe with you. It's actually a recipe x 2 and is perfect for spring and summer gatherings!

I do not profess to be a baker. Baking is science and while I dig science, I'm more of a mad scientist. This year I decided to make Champagne Cupcakes for the Oscars which was risky for sure. The recipes I found online were all 100% from scratch so I started to think how I could reconceptualize this idea. What is light like champagne? Angel Food! Do they make it in mix form? Yes! What else do you mix in? Water. Perfect! Champagne is my usual substitution for water anyway!


Instead of full sized cupcakes, I decided to make minis which had I used the entire box would have made about 70 - too many for the Oscars. Instead I made half the box and therefore used 1/2 the water/champagne. For the frosting, I found a great recipe for a Champagne Buttercream on The Curvy Carrot however I tried to make from memory (and with butter that wasn't quite room temperature) so my frosting didn't look quite right but it tasted GREAT. This is my common problem in baking - taste 10, looks 5. Plus I threw in some additional champagne so that might have also been part of the problem. Enough of the prologue, let's get to the recipe!


Champagne Cupcakes (Makes approximately 70 mini cupcakes if you use the entire box)

1 box Angel Food cake mix
1 1/4 cup champagne (or other sparkling wine)

1. Pre-heat oven to 375 degrees. Line your muffin pan with liners. Angel food cake is a little sticky so I would not recommend using silicone baking cups without liners.

2. Using an electric mixer, beat the mixture for 30 seconds at a low speed to moisten and then 1 minute at medium. DO NOT OVERBEAT. This will make it too airy.

3. Add batter to liners, filling about 3/4 full. DO NOT OVERFILL. They will be misshapen and stick to the pan. Bang the pan on the counter to remove air bubbles. Very important or you will have giant holes in your cupcakes.

4. Bake for 10 - 15 minutes. Each oven is different so I suggest checking them at 10 minutes and determining how much longer by the look. When done, they will be golden brown and the cracks will be dry.

5. Cool on a wire rack.


Champagne Buttercream

3 & 1/4 cups powdered sugar
1 cup unsalted butter, at room temperature
1/2 teaspoon vanilla extract
3 tablespoons champagne, at room temperature (I used a bit more for flavor)

1. With an electric mixer, beat together sugar and butter. Mix on low until well blended, and then on medium for another two minutes.

2. Add vanilla and champagne, beating on medium for another minute.

3. Pipe onto cooled cupcakes using your favorite pastry tip or just by filling a plastic bag and cutting of the corner to create your own pastry bag.

Before you look at the final product, remember that I did NOT follow these directions as I should have. Learn from my mistakes and have prettier cupcakes!


Angel Food Cupcakes with Blueberries

For the second Angel Food cupcake preparation, it is more in the presentation than changing the recipe. Angel Food and berries are a natural and classic combo however I wanted to serve them together without a frosting. Transporting frosted cupcakes is always a challenge so I came up with this simple yet attractive way as an alternative.

Angel Food mini cupcakes
Blueberries (or any other fruit you prefer)
Powdered sugar
toothpicks

1. Using a sifter or mesh strainer, dust the cupcakes with powdered sugar.

2. Thread three blueberries on to each toothpick and then place the free end of the toothpick into the cupcake.


I love this idea for summer as you can use whatever fruit is in season. For 4th of July you can alternate blueberries and strawberries or raspberries. It is perfect for picnics as you can assemble on site and they are temperature stable. Plus they are actually a pretty healthy dessert - Angel Food cake is fat free!


Wednesday, February 5, 2014

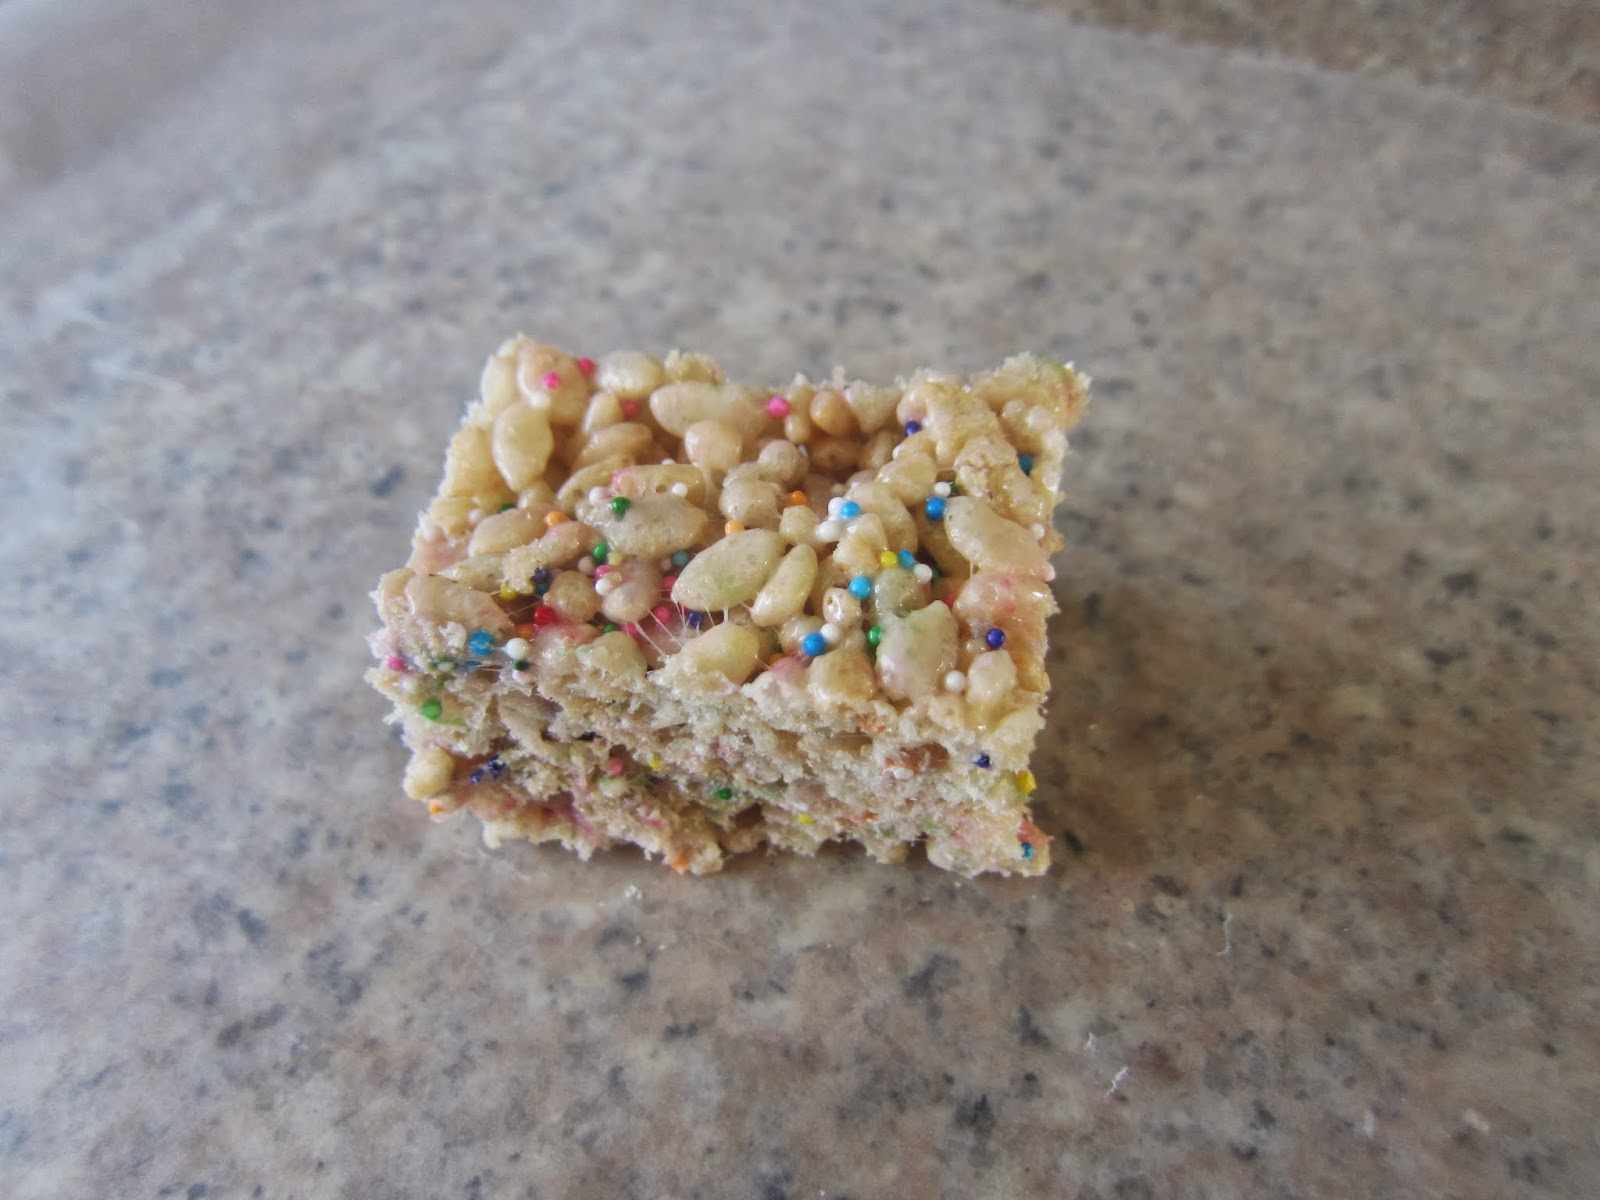
Rice Krispie Treat Pops

My birthday was last month and I decided I wanted to make somesort of treat to share with my friends. Since we were going to be at a bar, I wanted something that would be easy to eat - something on a stick. I am not much of a baker and did not want to spend a lot of time in the kitchen. I recalled seeing some photos on Pinterest of Rice Krispie Treat Pops - bingo!

After looking at several recipes, I really did not find what I was looking for in any one single recipe. So of course I put together the best parts along with some advice from Lisa at The Little Red Apron and my own ideas! My pops turned out great so hopefully this will help you in the creation of your own pops! I wanted to make sure to share these before Valentine's Day for all of you parents that are looking for a fun treat for a classroom party. What I love about this recipe is that it is completely adaptable for any holiday or occasion just by do any of the following:

  • Using different colors of chocolate
  • Adding or subtracting sprinkles
  • Changing the color and/or shape of sprinkles
  • Adding a few drops of food coloring
  • Using different sticks
  • Mixing in other cereals
  • Cutting shapes out of the treats
It's like the Choose Your Own Adventure of desserts!


Rice Krispie Treat Pops

4 tablespoons butter or margarine (Note: This is one tablespoon more than Kellogg's recommends.)
1 10 oz package of fresh marshmallows
6 cups Rice Krispie cereal (Note: There is now a gluten free version and I have been told it tastes the same.)
1 teaspoon vanilla or almond extract, optional
sprinkles, optional
Melting chocolate

1. In a large saucepan, melt the butter over low heat. Add marshmallows and stir until completely melted. Add optional extract for a flavor boost (I used vanilla). This is also when optional food coloring should be added. Remove from heat.

2. Slowly add cereal to marshmallow mixture. Sprinkles should be added with cereal - I like a lot of sprinkles so add to your liking. Do not add sprinkles to measured cereal as they will sift to the bottom and will be a challenge to mix evenly. I recommend adding half the cereal and some sprinkles to start. Then keep adding both until all of the cereal is used and you have achieved your preferred level of sprinkle. I probably used just shy of a 1/4 of a cup of sprinkles.

3. Once thoroughly mixed, use a buttered spatula or wax paper to press into a 13 x 9 inch (or similar sized) pan that has been greased with cooking spray or butter.Traditionally you wouldn't want to push the mixture down too much as it can make for a dense treat. You want a dense treat for the pops. Make sure to build them up so that they are square enough to be a pop. You will likely not fill the pan.


4. Cool on the counter or pop into the fridge of freezer to speed the process along.

5. Cut into even squares no smaller than 2 x 2 inches. I did not measure exactly so mine are different sizes. If you want them to be uniform you will need to measure your pan and do some math. You will likely have some scraps on one end where it wasn't exactly the same height as the rest. This is the cook's treat. Enjoy while you finish the pops!


6. Melt the chocolate (I got mine at Michaels) in the microwave or a double boiler. I recommend the microwave as it makes clean up that much easier. However make sure you are using the type of chocolate that can be used in the microwave. If you use regular chocolate chips you run the risk of scorching the chocolate.

7. Dip a treat stick into the melted chocolate and then push through the shorter end of the treat until it is about halfway through. As the chocolate hardens it will help anchor the treat to the stick. I also recommend you wear an apron. As you can see by the photo below I did not.


8. Stick your pop in the melted chocolate. I find that the microwave chocolate is very thick so I used a mini spatula to help brush it up on the sides and also to make sure each pop wasn't TOO chocolaty. Place pop on a piece of wax paper to allow the chocolate to harden. If you want to add MORE sprinkles, this would be the time to do so before the chocolate cools.

9. Repeat for remaining pops and once they are cool place them in an air tight container. As with traditional treats, these are best the day they are made and should be consumed within two days.


I promise these treats will be a hit. One girl at my party ate four of them. Yes, four of them. Is it wrong that I want to make another batch of these right now? Have fun and be sure to let me know about any interesting combinations you create!!!


Thursday, January 30, 2014

Super Bowl Sunday!!!!

Growing up I was not a fan of the Super Bowl. Despite being a cheerleader for a few years, I just could never get into the game. Then in college (and for some years after) the Super Bowl conflicted with my birthday - some years being the same day. That is not the best way to turn me into a fan! Finally the NFL wised up and pushed it back a week. Now I can enjoy my birthday weekend AND top off two months of gluttony with a big greasy finish.

Of course you don't have to go crazy on the calories for the Super Bowl. My contribution to the festivities in 2012 was a wonderful Jalapeno Popper Dip. I found the recipe on Pinterest and then changed a few ingredients to lighten it up. It was delicious!

Last year's dish was a take on the classic sliders and the calorie content was not as closely monitored. If you are hosting a large party, this particular dish is great because it stays warm in the slow cooker so people can help themselves!

Cheeseburger Bites
From Pillsbury Fast Slow Cooker Cookbook

This recipe includes my changes. One the major changes was that I doubled the recipe. The existing recipe only called for 1 lb of meat for 24 burger bites. This was just over a tablespoon per bite. I couldn't imagine anyone (especially guys) that would use so little! I also changed the cooking time thanks to the reviews on the website. 3 to 4 hours sounded crazy!

Bites
2 lb lean (at least 80% - I used 90 or 95% lean) ground beef
4 tablespoons ketchup
4 teaspoons instant minced onion (I didn't have minced onion so I finely chopped some onion and sauteed it before adding the meat.)
2 teaspoons yellow mustard
16 oz (2 blocks) cheddar cheese, or whatever cheese you like (the recipe called for American and I used 1 block of cheddar and 1 Monterey Jack), cut into 2 inch cubes
24 miniature burger buns

Toppings
Dill pickle chips
Sliced plum (Roma) tomatoes
Shredded lettuce (I used butter lettuce from a bag of salad.)
Additional ketchup and mustard
Other toppings you enjoy - I also provided relish, sauteed onions, and mayo.

1. In 10 inch skillet, cook beef over medium-high heat 5 to 7 minutes, stirring frequently, until thoroughly cooked; drain. Stir in ketchup, onion (unless you cooked fresh onion with the meat), and mustard.

2. Spray 3 1/2 to 4 quart slow cooker with cooking spray. Spoon beef mixture into slow cooker. Top with cheese.

3. Cover; cook on Low heat setting for 1 - 2 hours. Check at one hour to see if the cheese is melted. It may still look "cubed" but if you start to stir it the cubes fall away. I found that mine was ready in a little over an hour. With occasional stirring, this dish will hold on Low heat for several hours. Eventually I did turn off the slow cooker and with the lid on it stayed warm. It can burn if left on for too long.

4. Serve with the buns and toppings. Either assemble yourself or create a buffet for guests to top as they desire.

Photo courtesy of Pillsbury as I forgot to take one.

Looking for some more great recipes for the big game? Thrillist posted some great recipes earlier today. You can find them here.


So now that you have your food squared away, you need to think decor. Here are a few easy ways to dress up your Super Bowl party.

Free Signage
There are a number of free Super Bowl printables available online. You can do a simple search via search engine or Pinterest. This set from A to Zebra Celebrations is both simple and cute. Here is a sample of what you will find.


Make Easy Signage
I made this little sign to fit the Tolsby frame from IKEA. A simple font was used so that anyone attending the party could make one for their dish. Just pulled the Super Bowl logo online and added a border and a text box in Word. Super simple!


Double Duty Decor
Get this great cylinder set from IKEA and fill with a variety of items including football shaped chocolates and plastic football or helmet rings. Guests can snack on the chocolate and wear the rings!


Hope you have a great Super Bowl Sunday and that you win your score square! If you have some favorite dishes for the Super Bowl, be sure to share them below!