Showing posts with label michaels. Show all posts

Monday, October 15, 2018

Diner en Blanc Los Angeles - An East Culver City Wonderland

On Saturday, September 29, Diner en Blanc once again returned to Los Angeles! Diner en Blanc (in English translated to "Dinner in White") began as a simple gathering of friends in Paris nearly 30 years ago. Now it is hosted in cities all over the world in the most elegant of public spaces! It is a flash mob style, "chic picnic" where guests are dressed elegantly and dine on fine food and wine while enjoying fabulous entertainment.

Having attended three of the previous four Los Angeles events, it is an amazing undertaking with many volunteers, complicated transportation, and unique entertainment! While the event itself is quite magical, it is also a bit of an undertaking as an attendee as well. Attendees are expected to provide everything needed for the dinner including table, white chairs, white cloth linens, white plates, real silverware, real glassware and of course an elegant picnic dinner! And of course a chic all white outfit. A lot to prepare and a lot to transport!

When the 2018 Los Angeles event came along, my friends and I just could not commit immediately and tickets sold out quickly. The theme was "Wonderland" this year and as a big Alice in Wonderland fan, I did not want to miss out on the celebration! Rather than attending the main soiree, I went back to the roots of Diner en Blanc and hosted friends at my own house in "East Culver City". While my house and yard are not large, I was still able to keep the dining location "secret" until just before just like the real event!

So how did I pull off a magical event at my own home without spending a lot of time or money? Read on for all of the details!


Decor

The decor was the biggest effort for this event. I knew I wanted to host it outside and while the landscaping in my backyard is beautiful, I needed to bring the "magic" as well as Wonderland to life. In Alice in Wonderland, the playing cards are caught painting the white roses bushes red so I used that as a jumping off point for decorating my own hedges. Of course as it is Diner en Blanc the roses stayed white! I purchased faux flowers from Michael's and inserted those into the hedge and then added strands of white lights to add that beautiful glow once the sun went down.


As for the tablescape itself, I built the centerpiece around the concept of the Mad Hatter's hat. I found a white top hat from Target and added the proper 10/6 sign to tie in theme. To keep it simple, I used more flowers from Michael's and a feather to complete the centerpiece. Real flowers would have been beautiful as well but I was concerned that they would look droopy by the time we sat down as there was no way to place them in a vase. In addition I scanned pages from an Alice in Wonderland book and included a page at each place setting. We all enjoyed reading the passages aloud during dinner though for some they were confusing out of context! I also cut out the various playing card symbols from glitter foam to add some dimension to the table. Finally I used two white tea cups with blooms and "Drink Me" tags to bring our own "mad tea party" together. Classic tea lights from my collection completed the table.


I focused primarily on decorating the hedge and the table however did include some signage in the trees that led back to our dining area and also some croquet set pieces to tie in with the Queen of Heart's rose garden. The signs include "This Way", "That Way", "Up", "Down", "Go Back", and "Yonder" with the Disney animated film as inspiration.


The entire cost for the décor was approximately $20. I purchased the flowers, hat and glitter foam. I already owned the book so used my home printer for the signage and book excerpts. As for the linens, dishes, etc., I already owned everything I needed since they were all basics. I used a table I owned and borrowed the chairs, tea cups and lights from a friend!

Menu

The menu was kept simple with everyone bringing a contribution. We started with some appetizers before heading to the "secret" location. Then we enjoyed a three course meal that began with a lovely fall salad. I prepared the entrée and went with this delicious Slow Cooker Mediterranean Chicken. Since we did not have to actually pack a picnic, we had the luxury of a hot entrée. This recipe was great because the cooking didn't have to be hands on until just prior to serving. I made a few minor modifications to this including adding a little bit of chicken stock and substituting pre-chopped white for yellow onions (a great time saver). I also already had chicken tenderloin pieces so used them instead of the full breasts. Once seared in the pan, the chicken cooked for a bit on low before I turned it up to high. I want to say it was less than an hour total. It was cooked through and very juicy. I would highly recommend this entrée for a dinner party or a Tuesday night! I served it with a side of Quinoa and Kale from Aldi. No photo because we were too focused on eating but here is a photo of our sweet ending! One of my guests made delicious vanilla cupcakes (gluten free no less) and put them in cute Alice in Wonderland wrappers! We also had macarons to complete the tea party theme!


I added some other touches like an Alice in Wonderland playlist (happy to share upon request!) and dressed like the White Rabbit!

I also experimented with making a video before everyone arrived. It is a one take, non-rehearsed, selfie video so please be kind in the comments! You will notice in the video I tried out an alternate name "Champagne Parties on a Beer Budget". Possibly a spin off blog? Let me know what you think!




Wednesday, February 5, 2014

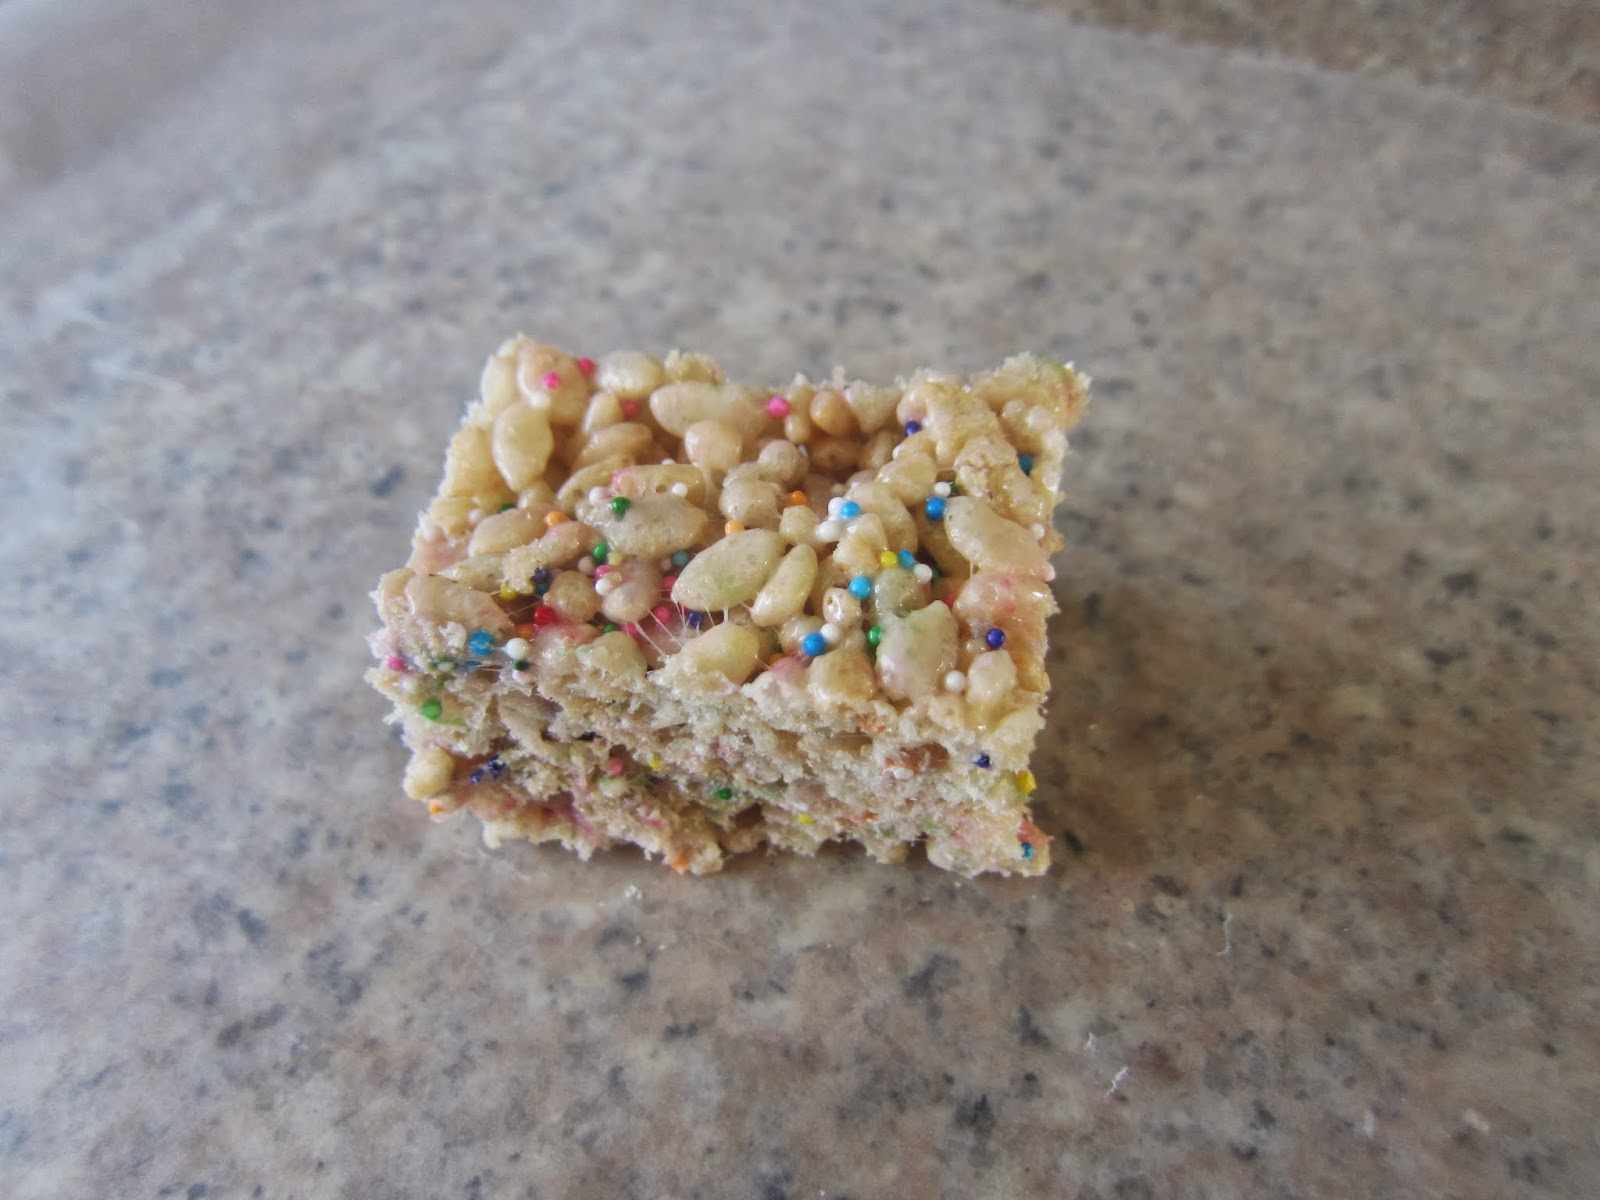
Rice Krispie Treat Pops

My birthday was last month and I decided I wanted to make somesort of treat to share with my friends. Since we were going to be at a bar, I wanted something that would be easy to eat - something on a stick. I am not much of a baker and did not want to spend a lot of time in the kitchen. I recalled seeing some photos on Pinterest of Rice Krispie Treat Pops - bingo!

After looking at several recipes, I really did not find what I was looking for in any one single recipe. So of course I put together the best parts along with some advice from Lisa at The Little Red Apron and my own ideas! My pops turned out great so hopefully this will help you in the creation of your own pops! I wanted to make sure to share these before Valentine's Day for all of you parents that are looking for a fun treat for a classroom party. What I love about this recipe is that it is completely adaptable for any holiday or occasion just by do any of the following:

  • Using different colors of chocolate
  • Adding or subtracting sprinkles
  • Changing the color and/or shape of sprinkles
  • Adding a few drops of food coloring
  • Using different sticks
  • Mixing in other cereals
  • Cutting shapes out of the treats
It's like the Choose Your Own Adventure of desserts!


Rice Krispie Treat Pops

4 tablespoons butter or margarine (Note: This is one tablespoon more than Kellogg's recommends.)
1 10 oz package of fresh marshmallows
6 cups Rice Krispie cereal (Note: There is now a gluten free version and I have been told it tastes the same.)
1 teaspoon vanilla or almond extract, optional
sprinkles, optional
Melting chocolate

1. In a large saucepan, melt the butter over low heat. Add marshmallows and stir until completely melted. Add optional extract for a flavor boost (I used vanilla). This is also when optional food coloring should be added. Remove from heat.

2. Slowly add cereal to marshmallow mixture. Sprinkles should be added with cereal - I like a lot of sprinkles so add to your liking. Do not add sprinkles to measured cereal as they will sift to the bottom and will be a challenge to mix evenly. I recommend adding half the cereal and some sprinkles to start. Then keep adding both until all of the cereal is used and you have achieved your preferred level of sprinkle. I probably used just shy of a 1/4 of a cup of sprinkles.

3. Once thoroughly mixed, use a buttered spatula or wax paper to press into a 13 x 9 inch (or similar sized) pan that has been greased with cooking spray or butter.Traditionally you wouldn't want to push the mixture down too much as it can make for a dense treat. You want a dense treat for the pops. Make sure to build them up so that they are square enough to be a pop. You will likely not fill the pan.


4. Cool on the counter or pop into the fridge of freezer to speed the process along.

5. Cut into even squares no smaller than 2 x 2 inches. I did not measure exactly so mine are different sizes. If you want them to be uniform you will need to measure your pan and do some math. You will likely have some scraps on one end where it wasn't exactly the same height as the rest. This is the cook's treat. Enjoy while you finish the pops!


6. Melt the chocolate (I got mine at Michaels) in the microwave or a double boiler. I recommend the microwave as it makes clean up that much easier. However make sure you are using the type of chocolate that can be used in the microwave. If you use regular chocolate chips you run the risk of scorching the chocolate.

7. Dip a treat stick into the melted chocolate and then push through the shorter end of the treat until it is about halfway through. As the chocolate hardens it will help anchor the treat to the stick. I also recommend you wear an apron. As you can see by the photo below I did not.


8. Stick your pop in the melted chocolate. I find that the microwave chocolate is very thick so I used a mini spatula to help brush it up on the sides and also to make sure each pop wasn't TOO chocolaty. Place pop on a piece of wax paper to allow the chocolate to harden. If you want to add MORE sprinkles, this would be the time to do so before the chocolate cools.

9. Repeat for remaining pops and once they are cool place them in an air tight container. As with traditional treats, these are best the day they are made and should be consumed within two days.


I promise these treats will be a hit. One girl at my party ate four of them. Yes, four of them. Is it wrong that I want to make another batch of these right now? Have fun and be sure to let me know about any interesting combinations you create!!!


Wednesday, November 6, 2013

Thanksgiving Tablescapes - 1 Set of Decor, 2 Ways

While we are still a few weeks away from Thanksgiving, it is never too early to start thinking about your holiday tablescape! The past two years I have been a host/co-host for the big Thanksgiving dinner and figuring out the plan for the table has been one of my primary tasks. Here are two examples of how I took the same basic items and created two very different tablescapes.

Tablescape #1 - Classic Meets Childhood Nostalgia

Items purchased from Michael's:
  • Silk Autumn leaves (since in California ACTUAL leaves are difficult to come by)
  • Clear votive holders
  • Pine cones
  • White banner paper
  • Crayons
Items purchased from Trader Joe's:
  • Assorted mini pumpkins and gourds
Thanksgiving this particular year was a large group that did not know each other well (multiple friend groups) so we wanted to make sure the table was festive but also fun. We also had a lot of table top to cover so we wanted to get the most bang for our buck. We used folding tables which are not as wide as a standard dining table so the best use of space was to do a "runner" of decor down the center of the table. As you can see in the photo below, we alternated the various elements to create variety along the center of the table.


So what about these crayons and the childhood nostalgia? Do you remember back to your early educational years when you made Thanksgiving turkeys by tracing around your hand? Yep, we brought them back! Since we wanted to mix up the group and encourage people to get to know each other we thought this was a fun way to do our placecards! Then once you were done eating (or taking a break) you could use the crayons on the table to decorate your bird. I wish I would have taken some photos of the finished products - this was a very creative group!


While our group was a mixed bag of ages, this idea could work for the "kids table" even if you plan a more formal tablescape for your Thanksgiving.
 
Tablescape #2 - Eclectic Chic
 
When year number two rolled around and I looked to repurposing our Thanksgiving decor, I was dealing with a very different venue and group size. Dinner was for just six around the dining table at my home. I wanted to go with something a bit more formal but still fun. Items I used from the previous year include:
 
  • Silk Autumn leaves
  • Clear votive holders (I used some with texture that I picked up at a garage sale for just $.25 each!)
  • Pine cones
  • Mini pumpkins (Purchased new)
To this I added a printed tablecloth (borrowed from a friend) and a modern white vase (also from a garage sale though originally from CB2) with flowers from Trader Joe's. My original vision was with a white tablecloth and while that would have showcased the decor a bit more, I do think the table came together nicely with the addition of the lime green napkins.


Last year post holiday I picked up these great mini ceramic pumpkins from Crate and Barrel on sale for just a couple dollars each! They are meant to be used as a vase but could just as easily be used as a candle holder or even just on their own! Unfortunately they are no longer sold online but I did see them last month at the Crate & Barrel Outlet in Carlsbad and they ship! I believe they were just $3 a piece.

Crate and Barrel does have a great product that is available this season - dried Gourds. These are perfect if you want stick with reusable products. They come in the two colors in the photo below.


I hope these ideas have helped inspire your own Thanksgiving tabletop! Please let me know what creative ideas you are incorporating this year.

Coming later this month - Thanksgiving Cocktails!