We all lead busy lives and sometimes (or most of the time) when we entertain we just do not have time to prepare each dish with Martha Stewart level precision. Why not fake it instead of make it?!
Just in time for Super Bowl Sunday, here is a great way to "soop up" a regular supermarket veggie display!
The beautiful display you see in the photo below is a standard large vegetable tray (photo above) without dip from Ralphs grocery store. I used a large, wide bowl with low sides and arranged the veggies by type/shape while also creating an attractive color story. I utilized a small condiment dish with three separate containers to offer a variety of dips. Dips included are: Roasted Red Pepper Hummus, Reduced Guilt Spinach and Kale Dip (both from Trader Joe's), and Opa Greek Yogurt Ranch Dressing.
This display could easily be replicated with just one smaller dish in the center. This would make it easy should you use the dip that comes with many trays. Have a chip and dip bowl? That would be perfect for this too!
Just because you didn't make it from scratch doesn't mean your guests have to know!
Wednesday, January 30, 2019
Makeover your Supermarket Veggie Tray
Labels:
broccoli,
carrots,
creative,
dip,
easy,
entertaining,
fast,
grocery,
makeover,
opa,
parties,
pepper,
ralphs,
ranch,
simple,
spinach,
super bowl,
tomato,
trader joes,
veggie tray
Monday, October 15, 2018
Diner en Blanc Los Angeles - An East Culver City Wonderland
On Saturday, September 29, Diner en Blanc once again returned to Los Angeles! Diner en Blanc (in English translated to "Dinner in White") began as a simple gathering of friends in Paris nearly 30 years ago. Now it is hosted in cities all over the world in the most elegant of public spaces! It is a flash mob style, "chic picnic" where guests are dressed elegantly and dine on fine food and wine while enjoying fabulous entertainment.
Having attended three of the previous four Los Angeles events, it is an amazing undertaking with many volunteers, complicated transportation, and unique entertainment! While the event itself is quite magical, it is also a bit of an undertaking as an attendee as well. Attendees are expected to provide everything needed for the dinner including table, white chairs, white cloth linens, white plates, real silverware, real glassware and of course an elegant picnic dinner! And of course a chic all white outfit. A lot to prepare and a lot to transport!
When the 2018 Los Angeles event came along, my friends and I just could not commit immediately and tickets sold out quickly. The theme was "Wonderland" this year and as a big Alice in Wonderland fan, I did not want to miss out on the celebration! Rather than attending the main soiree, I went back to the roots of Diner en Blanc and hosted friends at my own house in "East Culver City". While my house and yard are not large, I was still able to keep the dining location "secret" until just before just like the real event!
So how did I pull off a magical event at my own home without spending a lot of time or money? Read on for all of the details!
Decor
The decor was the biggest effort for this event. I knew I wanted to host it outside and while the landscaping in my backyard is beautiful, I needed to bring the "magic" as well as Wonderland to life. In Alice in Wonderland, the playing cards are caught painting the white roses bushes red so I used that as a jumping off point for decorating my own hedges. Of course as it is Diner en Blanc the roses stayed white! I purchased faux flowers from Michael's and inserted those into the hedge and then added strands of white lights to add that beautiful glow once the sun went down.
As for the tablescape itself, I built the centerpiece around the concept of the Mad Hatter's hat. I found a white top hat from Target and added the proper 10/6 sign to tie in theme. To keep it simple, I used more flowers from Michael's and a feather to complete the centerpiece. Real flowers would have been beautiful as well but I was concerned that they would look droopy by the time we sat down as there was no way to place them in a vase. In addition I scanned pages from an Alice in Wonderland book and included a page at each place setting. We all enjoyed reading the passages aloud during dinner though for some they were confusing out of context! I also cut out the various playing card symbols from glitter foam to add some dimension to the table. Finally I used two white tea cups with blooms and "Drink Me" tags to bring our own "mad tea party" together. Classic tea lights from my collection completed the table.
I focused primarily on decorating the hedge and the table however did include some signage in the trees that led back to our dining area and also some croquet set pieces to tie in with the Queen of Heart's rose garden. The signs include "This Way", "That Way", "Up", "Down", "Go Back", and "Yonder" with the Disney animated film as inspiration.
The entire cost for the décor was approximately $20. I purchased the flowers, hat and glitter foam. I already owned the book so used my home printer for the signage and book excerpts. As for the linens, dishes, etc., I already owned everything I needed since they were all basics. I used a table I owned and borrowed the chairs, tea cups and lights from a friend!
Menu
The menu was kept simple with everyone bringing a contribution. We started with some appetizers before heading to the "secret" location. Then we enjoyed a three course meal that began with a lovely fall salad. I prepared the entrée and went with this delicious Slow Cooker Mediterranean Chicken. Since we did not have to actually pack a picnic, we had the luxury of a hot entrée. This recipe was great because the cooking didn't have to be hands on until just prior to serving. I made a few minor modifications to this including adding a little bit of chicken stock and substituting pre-chopped white for yellow onions (a great time saver). I also already had chicken tenderloin pieces so used them instead of the full breasts. Once seared in the pan, the chicken cooked for a bit on low before I turned it up to high. I want to say it was less than an hour total. It was cooked through and very juicy. I would highly recommend this entrée for a dinner party or a Tuesday night! I served it with a side of Quinoa and Kale from Aldi. No photo because we were too focused on eating but here is a photo of our sweet ending! One of my guests made delicious vanilla cupcakes (gluten free no less) and put them in cute Alice in Wonderland wrappers! We also had macarons to complete the tea party theme!
I added some other touches like an Alice in Wonderland playlist (happy to share upon request!) and dressed like the White Rabbit!
I also experimented with making a video before everyone arrived. It is a one take, non-rehearsed, selfie video so please be kind in the comments! You will notice in the video I tried out an alternate name "Champagne Parties on a Beer Budget". Possibly a spin off blog? Let me know what you think!
Having attended three of the previous four Los Angeles events, it is an amazing undertaking with many volunteers, complicated transportation, and unique entertainment! While the event itself is quite magical, it is also a bit of an undertaking as an attendee as well. Attendees are expected to provide everything needed for the dinner including table, white chairs, white cloth linens, white plates, real silverware, real glassware and of course an elegant picnic dinner! And of course a chic all white outfit. A lot to prepare and a lot to transport!
When the 2018 Los Angeles event came along, my friends and I just could not commit immediately and tickets sold out quickly. The theme was "Wonderland" this year and as a big Alice in Wonderland fan, I did not want to miss out on the celebration! Rather than attending the main soiree, I went back to the roots of Diner en Blanc and hosted friends at my own house in "East Culver City". While my house and yard are not large, I was still able to keep the dining location "secret" until just before just like the real event!
So how did I pull off a magical event at my own home without spending a lot of time or money? Read on for all of the details!
Decor
The decor was the biggest effort for this event. I knew I wanted to host it outside and while the landscaping in my backyard is beautiful, I needed to bring the "magic" as well as Wonderland to life. In Alice in Wonderland, the playing cards are caught painting the white roses bushes red so I used that as a jumping off point for decorating my own hedges. Of course as it is Diner en Blanc the roses stayed white! I purchased faux flowers from Michael's and inserted those into the hedge and then added strands of white lights to add that beautiful glow once the sun went down.
As for the tablescape itself, I built the centerpiece around the concept of the Mad Hatter's hat. I found a white top hat from Target and added the proper 10/6 sign to tie in theme. To keep it simple, I used more flowers from Michael's and a feather to complete the centerpiece. Real flowers would have been beautiful as well but I was concerned that they would look droopy by the time we sat down as there was no way to place them in a vase. In addition I scanned pages from an Alice in Wonderland book and included a page at each place setting. We all enjoyed reading the passages aloud during dinner though for some they were confusing out of context! I also cut out the various playing card symbols from glitter foam to add some dimension to the table. Finally I used two white tea cups with blooms and "Drink Me" tags to bring our own "mad tea party" together. Classic tea lights from my collection completed the table.
I focused primarily on decorating the hedge and the table however did include some signage in the trees that led back to our dining area and also some croquet set pieces to tie in with the Queen of Heart's rose garden. The signs include "This Way", "That Way", "Up", "Down", "Go Back", and "Yonder" with the Disney animated film as inspiration.
The entire cost for the décor was approximately $20. I purchased the flowers, hat and glitter foam. I already owned the book so used my home printer for the signage and book excerpts. As for the linens, dishes, etc., I already owned everything I needed since they were all basics. I used a table I owned and borrowed the chairs, tea cups and lights from a friend!
Menu
The menu was kept simple with everyone bringing a contribution. We started with some appetizers before heading to the "secret" location. Then we enjoyed a three course meal that began with a lovely fall salad. I prepared the entrée and went with this delicious Slow Cooker Mediterranean Chicken. Since we did not have to actually pack a picnic, we had the luxury of a hot entrée. This recipe was great because the cooking didn't have to be hands on until just prior to serving. I made a few minor modifications to this including adding a little bit of chicken stock and substituting pre-chopped white for yellow onions (a great time saver). I also already had chicken tenderloin pieces so used them instead of the full breasts. Once seared in the pan, the chicken cooked for a bit on low before I turned it up to high. I want to say it was less than an hour total. It was cooked through and very juicy. I would highly recommend this entrée for a dinner party or a Tuesday night! I served it with a side of Quinoa and Kale from Aldi. No photo because we were too focused on eating but here is a photo of our sweet ending! One of my guests made delicious vanilla cupcakes (gluten free no less) and put them in cute Alice in Wonderland wrappers! We also had macarons to complete the tea party theme!
I added some other touches like an Alice in Wonderland playlist (happy to share upon request!) and dressed like the White Rabbit!
I also experimented with making a video before everyone arrived. It is a one take, non-rehearsed, selfie video so please be kind in the comments! You will notice in the video I tried out an alternate name "Champagne Parties on a Beer Budget". Possibly a spin off blog? Let me know what you think!
Monday, May 8, 2017
Carrot Top Pesto & Roasted Carrots with Imperfect Produce
Recently I started getting vegetable deliveries from a great company called Imperfect Produce. Their business model is to take fruit and vegetables that are not cute enough to sell in stores (and often go to waste) and offer them at a reasonable price for home delivery. I decided to give it a try because:
1. I like the idea of eliminating food waste.
2. More veggies are never a bad thing.
3. My cooking routine needed some variety.
4. Most importantly the delivery is both right sized for my lifestyle and can be customized.
If you live in LA, the San Francisco Bay Area or Orange County, I suggest you give it a try! If you sign up before May 10 and use the code "April Friend" you'll get $20 in free groceries! List me as your referral and get $10 more! If you are reading this after May 10, then you will just be able to get the referral bonus.
Enough about my sales pitch (though seriously they should hire me!), let me share some of my new recipes!
In my first order I received organic rainbow carrots with the tops. I immediately knew I wanted to experiment with a pesto! I found a few recipes online but the one I liked best was super simple and addictively good. I have since made it another way but that is a another post!
This recipe was from a website called Don't Waste the Crumbs. I need to spend some time looking through this site as the author is all about making healthy meals for her family with real food and on a budget! It does not contain any cheese so it is good for vegans too!
As per usual, I made some modifications to this recipe which I will note below but here is the recipe as written for the most part. My notes will be indicated with a "G".
Carrot Top Pesto
3 Tbsp nuts, roughly chopped
1 garlic clove (G - If using minced garlic from the jar, use 1 1/2 teaspoons)
2 cups carrot tops (from 4-5 carrots, roughly chopped)
1/2 cup packed fresh herbs
1/2 – 3/4 cup extra virgin olive oil
salt and pepper to taste
G - I used pistachios & basil for my nut and herb selection
1. Measure nuts and garlic into a food processor. Pulse until a rough paste forms. How much of a paste you form will depend on the type of nut you use. (The natural oils from the nut will be released to form the paste).
2.Add carrot tops and herbs and pulse until everything is in teeny tiny pieces and creates an even thicker, rougher paste. G - You will probably need to scrape the sides a bit. I also found that some of my garlic/nut mixture had a difficult time combining on it's own.
3. Add 1/2 cup olive oil and pulse/blend until the mixture is mostly smooth. If the pesto is too thick, add additional olive oil if desired, 1 Tbsp at a time. G- I did not measure this exactly and ended up adding a little citrus oil too.
4. Season with salt and pepper.
5. Makes about 1 cup. Store in a glass jar in the fridge. If you’re using quality olive oil, the pesto will likely solidify in the fridge. Bring to room temperature for 10 minutes before using.
G - I would probably add some fresh lemon juice or zest next time as the citrus olive oil really enhanced the flavor.
Since I made the pesto on Grilled Cheese Day, I made myself an amazing sandwich and served it with a side of roasted carrots. The pesto was also a great dip for the carrots!
I simply used this recipe for the carrots from Food.com. I did not peel the carrots either - just cleaned them really well. No wasted skin!
Here is my photo of this delicious meal. My stomach is growling looking at it! My sandwich is a little on the lightly toasted side but only because I used healthy olive oil cooking spray instead of butter or mayo on the bread. It was still really good but I saved a few calories!
Do you have any good recipes to use up carrot tops or other often discarded parts of food?
Labels:
basil,
carrot,
carrots,
delivery,
food processor,
garlic,
grilled cheese,
herbs,
imperfect produce,
nuts,
olive oil,
pesto,
pistachios,
roasted,
tops,
vegan,
vegetable
Wednesday, November 18, 2015
Product Placement Wednesday - Trader Joe's Platinum Reserve Cabernet Sauvignon Truffles
Yes, after MUCH delay Product Placement Wednesday is back! Between work, life, and my other (often neglected) blog On The Tart Side is getting so much needed love!
Trader Joe's Platinum Reserve Cabernet Sauvignon Truffles
Trader Joe's always comes out with some amazing seasonal products this time of year - particularly in the chocolate department. I am keeping my fingers and toes crossed that this gem makes the cut to be a year round item! The Platinum Reserve Cabernet Sauvignon Truffles are make with 70% cacao dark chocolate and yes, Cabernet! The wine flavor is present but not overpowering - they remind me a bit of the Ghiradelli Intense Dark Cabernet Matinee. The advantage that the truffles have over the bar is that they are made with actual wine plus the delicious soft truffle center! I have enjoyed them with several varietals of red wine but as to be expected they paired best with full bodied wines.
While they are not overly huge truffles, at only 50 calories each you can enjoy more than one. This product is so new it is not on the Trader Joe's website yet. The only other mention I could find online was on eBay with someone selling at twice the cost! I recommend buying them ASAP and then hoarding them. They would also make nice gifts throughout the holiday season!
Trader Joe's Platinum Reserve Cabernet Sauvignon Truffles
Trader Joe's always comes out with some amazing seasonal products this time of year - particularly in the chocolate department. I am keeping my fingers and toes crossed that this gem makes the cut to be a year round item! The Platinum Reserve Cabernet Sauvignon Truffles are make with 70% cacao dark chocolate and yes, Cabernet! The wine flavor is present but not overpowering - they remind me a bit of the Ghiradelli Intense Dark Cabernet Matinee. The advantage that the truffles have over the bar is that they are made with actual wine plus the delicious soft truffle center! I have enjoyed them with several varietals of red wine but as to be expected they paired best with full bodied wines.
While they are not overly huge truffles, at only 50 calories each you can enjoy more than one. This product is so new it is not on the Trader Joe's website yet. The only other mention I could find online was on eBay with someone selling at twice the cost! I recommend buying them ASAP and then hoarding them. They would also make nice gifts throughout the holiday season!
Labels:
cabernet sauvignon,
chocolate,
ghiradelli,
trader joes,
truffle
Monday, January 26, 2015
Super Bowl Snack - BBQ Pulled Chicken Bites with Tex-Mex Feta Slaw
With the Super Bowl less than a week away, I thought it was way past due to share this super snack I made for last year's festivities! One of my favorite things to do when making a food item for a particular event is to take classic types of foods and give them a new spin. For example, the Super Bowl is all about American snack foods, meat, and beer. I went with BBQ and made a tasty treat that while a little higher end than what you might find at a Super Bowl party it fit in perfectly. Unfortunately the photos I took were not very good but I promise you the food is delicious! I probably could have made twice as many!
BBQ Pulled Chicken Bites with Tex-Mex Feta Slaw
The slaw was inspired by the Feta Slaw in Cooking Light.
1 package Trader Joe's BBQ Pulled Chicken (or your favorite local brand or restaurant)
1 package Trader Joe's Puff Pastry, thawed (2 sheets, total weight 1lb)
1 tablespoon white wine vinegar (I substituted red wine vinegar and it turned out fine)
1 tablespoon canola mayonnaise
1/4 teaspoon black pepper
2 cups angel hair coleslaw (I used one bag (10 oz) Trader Joe's Shredded Green Cabbage)
1/4 cup cilantro leaves
2 green onions, thinly sliced
1 jalapeno pepper, seeded and diced
1/4 cup feta cheese, crumbled (I used Trader Joe's Fat Free Feta)
1. Heat the oven to 400. Combine vinegar, mayonnaise, and black pepper in a large bowl, stirring with a whisk. Add coleslaw, cilantro, jalapeno, feta and green onions; toss to coat. As with most recipes, I suggest that you work with this as to your own preference. Want a little more heat? Add more jalapeno. Want more moisture in your slaw? Make more dressing. For best results, make at least an hour before serving so the flavors and meld.
2. Cut puff pastry into approximately 2 inch squares. I suggest that you measure you puff pastry and take those measurements into account so that your squares are even.
3. Spray a mini muffin pan with cooking spray and press a piece of puff pastry into each muffin cup. Top with pulled chicken.
4. Bake for approximately 15 minutes (you may wish to check beginning at 10 minutes. They are ready with the pastry is golden brown.
5. Serve either with the slaw on the side or top each bite with the slaw before serving. This will make about 36 bites though you will likely have leftover slaw. It was even better the next day!
Super Bowl Decor
Last year I posted some fun decor items for your Super Bowl party. There are so many great inspirational sites out there with great ideas from the simple to the elaborate. I was impressed that Target has created some cute items of their own for game day. You don't have to be crafty to elevate YOUR Super Bowl game! Here are two of my favorites - mini foam fingers and astroturf coasters! Of course the foam fingers aren't in either team's colors but they are in MY alma mater's colors (hint: Ohio University - buy these out!).
Have a great Super Bowl everyone!
BBQ Pulled Chicken Bites with Tex-Mex Feta Slaw
The slaw was inspired by the Feta Slaw in Cooking Light.
1 package Trader Joe's BBQ Pulled Chicken (or your favorite local brand or restaurant)
1 package Trader Joe's Puff Pastry, thawed (2 sheets, total weight 1lb)
1 tablespoon white wine vinegar (I substituted red wine vinegar and it turned out fine)
1 tablespoon canola mayonnaise
1/4 teaspoon black pepper
2 cups angel hair coleslaw (I used one bag (10 oz) Trader Joe's Shredded Green Cabbage)
1/4 cup cilantro leaves
2 green onions, thinly sliced
1 jalapeno pepper, seeded and diced
1/4 cup feta cheese, crumbled (I used Trader Joe's Fat Free Feta)
1. Heat the oven to 400. Combine vinegar, mayonnaise, and black pepper in a large bowl, stirring with a whisk. Add coleslaw, cilantro, jalapeno, feta and green onions; toss to coat. As with most recipes, I suggest that you work with this as to your own preference. Want a little more heat? Add more jalapeno. Want more moisture in your slaw? Make more dressing. For best results, make at least an hour before serving so the flavors and meld.
2. Cut puff pastry into approximately 2 inch squares. I suggest that you measure you puff pastry and take those measurements into account so that your squares are even.
3. Spray a mini muffin pan with cooking spray and press a piece of puff pastry into each muffin cup. Top with pulled chicken.
4. Bake for approximately 15 minutes (you may wish to check beginning at 10 minutes. They are ready with the pastry is golden brown.
5. Serve either with the slaw on the side or top each bite with the slaw before serving. This will make about 36 bites though you will likely have leftover slaw. It was even better the next day!
Super Bowl Decor
Last year I posted some fun decor items for your Super Bowl party. There are so many great inspirational sites out there with great ideas from the simple to the elaborate. I was impressed that Target has created some cute items of their own for game day. You don't have to be crafty to elevate YOUR Super Bowl game! Here are two of my favorites - mini foam fingers and astroturf coasters! Of course the foam fingers aren't in either team's colors but they are in MY alma mater's colors (hint: Ohio University - buy these out!).
Have a great Super Bowl everyone!
Labels:
bbq,
coleslaw,
cooking light,
decor,
feta,
football,
jalapeno,
patriots,
pinterest,
puff pastry,
pulled chicken,
seahawks,
slaw,
super bowl,
target
Wednesday, January 7, 2015
Product Placement Wednesday - Crate & Barrel Stacking Acrylic Wine Glasses
If you have read my previous posts over the years, you know that I LOVE picnic season! Yes, I realize it is January and picnic season seems very far off to many of you but GREAT deals on picnic items don't wait for the sun to shine!
You may already be familiar with some of my other picnic favorites from the past such as Steady Sticks and the Table in a Bag. Well this little steal goes perfectly with those items.
Crate & Barrel Stacking Acrylic Wine Glasses
These glasses great for picnics, pool side, or anywhere you don't want to take glass wine glasses. The alternative of drinking wine out of a red Solo cup just doesn't work for me! They fit perfectly on a Steady Stick for all of you fellow picnic lovers out there! Also, they are stackable so they take up very little cabinet space!
So why am I sharing this item in January? Because Crate & Barrel has them on super sale! Normally they are $3.95 a piece but right now you can get them for a fraction of the cost! Clear and blue are marked down to $.97 and green & red are just $.47!
Of course you don't have to save these cute glasses just for outdoor use! With the colors available they also lend themselves nicely to both Christmas and Hanukkuh. At this price you can pick up enough for next year's holiday party or any other occasion!
I personally picked up some blue glasses - which color are you getting?
Don't forget to check out my picnic recipes here, here and here!
You may already be familiar with some of my other picnic favorites from the past such as Steady Sticks and the Table in a Bag. Well this little steal goes perfectly with those items.
Crate & Barrel Stacking Acrylic Wine Glasses
These glasses great for picnics, pool side, or anywhere you don't want to take glass wine glasses. The alternative of drinking wine out of a red Solo cup just doesn't work for me! They fit perfectly on a Steady Stick for all of you fellow picnic lovers out there! Also, they are stackable so they take up very little cabinet space!
So why am I sharing this item in January? Because Crate & Barrel has them on super sale! Normally they are $3.95 a piece but right now you can get them for a fraction of the cost! Clear and blue are marked down to $.97 and green & red are just $.47!
Of course you don't have to save these cute glasses just for outdoor use! With the colors available they also lend themselves nicely to both Christmas and Hanukkuh. At this price you can pick up enough for next year's holiday party or any other occasion!
I personally picked up some blue glasses - which color are you getting?
Don't forget to check out my picnic recipes here, here and here!
Labels:
acrylic,
christmas,
crate and barrel,
hanukkah,
outdoors,
picnic,
plastic,
pool,
recipes,
sale,
stacking,
steady sticks,
table in a bag,
wine glass
Friday, December 19, 2014
Last Minute Holiday Recipes
Is it just me or did this year fly by? I just can't believe that Christmas is less than a week away! As you finalize your dishes for your holiday table, I would like to share a couple that I created for Thanksgiving that would translate well for events through the rest of the month! The Apple Cider Sangria is a great drink for a crowd and doesn't involve too many specialty (or unnaturally flavored) ingredients like many of the other recipes I encountered. The Pumpkin Cornbread Stuffing Bites were just the right about of sweet and savory to accompany a traditional or non-traditional holiday meal. They would also be great on a appetizer buffet! Please excuse the photos as always. These items are much more beautiful in real life! Enjoy!
Apple Cider Sangria
6 cups Trader Joe’s Pear Cinnamon Cider (If you can't find this particular cider, I would recommend adding some pear juice to your traditional cider as well as some cinnamon. Mix to taste.)
1 cup Captain Morgan’s Spiced Rum
1/2 cup Patron Citronage (or another orange flavored liquor)
2 apples (I used Sweet Tango), chopped
2 Bosc pears, chopped
1 orange, chopped
1 bottle Sauvignon Blanc
1. In a large bowl sealable bowl, combine the cider, rum, and
Citronage.
2. Add chopped fruit to cider and alcohol mixture. Stir well.
3. Seal and refrigerate for at least 3 hours though overnight
is recommended.
4. Prior to serving, mix in 1 bottle of Sauvignon Blanc.
5. Serve in a punchbowl or a pitcher. Make sure each glass gets
some of the delicious fruit in it!
Pumpkin Cornbread Stuffing Bites
4 cups Trader Joe’s Pumpkin Cornbread Croutons (Can't find these croutons? You can try regular cornbread croutons with some pumpkin pie spice.)
4 slices of bacon, chopped/crumbled (more if you want to amp up the bacon flavor, this can also be left out to make it vegetarian)
½ cup chopped shallots
2 tablespoons unsalted butter, browned
2 cups chicken broth (vegetable broth can be substituted, if you prefer a slightly more moist stuffing, you may want to consider adding another 1/2 cup broth)
¼ cup fresh sage, chopped
1. Pre-heat the oven 350.
2. Brown the unsalted butter in a 12 inch skillet (directions for creating browned butter can be found online).
3. As the butter starts to foam and brown, add the shallots so that as the butter finishes the shallots will get a quick saute.
4. Add the crumbled bacon, sage and broth. Heat to boiling.
5. Remove from heat and fold in the croutons and mix well.
6. Spray mini muffin tins with cooking spray.
7. Make small balls out of the stuffing mix and place one into each slot in the mini muffin tin.
8. Bake for 20-25 minutes until tops are crispy and the bites are set. This made exactly 2 dozen bites!
6. Spray mini muffin tins with cooking spray.
7. Make small balls out of the stuffing mix and place one into each slot in the mini muffin tin.
8. Bake for 20-25 minutes until tops are crispy and the bites are set. This made exactly 2 dozen bites!
Labels:
apple,
bacon,
browned butter,
captain morgan's spiced rum,
cider,
cinnamon,
citronge,
cornbread,
orange,
pear,
pumpkin,
sage,
sangria,
sauvignon blanc,
shallots,
stuffing,
trader joes
Wednesday, June 11, 2014
Product Placement Wednesday - Vaseline Spray & Go Moisturizer
Today I bring back Product Placement Wednesday to share a great product that is PERFECT for summer!
I will confess - my skin is under moisturized. I am usually in a hurry to get ready and don't have the time to wait for a heavy lotion to soak in before getting dressed. Plus in the summer who wants the weight of a thick moisturizer sitting on their skin? I live in California - it's summer here more than it isn't! Recently a friend was doing a promotion for this product and offered me a bottle as a sample. I had high expectations but this product has exceeded them. Application is simple - spray on the areas you would like to moisturize (it sprays upside down too so you can even reach your own back!) and then quickly rub the product to make sure it absorbs properly. Personally I like to apply and then brush my teeth. By the time I'm done, the Spray & Go is fully absorbed! There are three types - Total Moisture, Cocoa Radiant (with cocoa butter), and Aloe Fresh. So far I have only tried the Total Moisture but envision the Aloe Fresh to be perfect after a day in the sun - especially if you keep it in the fridge!
This week Vaseline Spray & Go is on sale at Target! What better way to kick off summer than with freshly moisturized skin at a discount price!
Labels:
aloe,
body,
cocoa butter,
continuous,
go,
lightweight,
lotion,
moisture,
moisturizer,
spray,
summer,
target,
vaseline
Sunday, April 27, 2014
Angel Food Cupcakes - 2 Ways with 1 Box of Mix!
I'm back! I have been MIA for so long due to a wrist sprain (of course when that finally healed work/life got busy!) but my wrist is more or less better and I'm so excited to share this fabulous recipe with you. It's actually a recipe x 2 and is perfect for spring and summer gatherings!
I do not profess to be a baker. Baking is science and while I dig science, I'm more of a mad scientist. This year I decided to make Champagne Cupcakes for the Oscars which was risky for sure. The recipes I found online were all 100% from scratch so I started to think how I could reconceptualize this idea. What is light like champagne? Angel Food! Do they make it in mix form? Yes! What else do you mix in? Water. Perfect! Champagne is my usual substitution for water anyway!
Instead of full sized cupcakes, I decided to make minis which had I used the entire box would have made about 70 - too many for the Oscars. Instead I made half the box and therefore used 1/2 the water/champagne. For the frosting, I found a great recipe for a Champagne Buttercream on The Curvy Carrot however I tried to make from memory (and with butter that wasn't quite room temperature) so my frosting didn't look quite right but it tasted GREAT. This is my common problem in baking - taste 10, looks 5. Plus I threw in some additional champagne so that might have also been part of the problem. Enough of the prologue, let's get to the recipe!
Champagne Cupcakes (Makes approximately 70 mini cupcakes if you use the entire box)
1 box Angel Food cake mix
1 1/4 cup champagne (or other sparkling wine)
1. Pre-heat oven to 375 degrees. Line your muffin pan with liners. Angel food cake is a little sticky so I would not recommend using silicone baking cups without liners.
2. Using an electric mixer, beat the mixture for 30 seconds at a low speed to moisten and then 1 minute at medium. DO NOT OVERBEAT. This will make it too airy.
3. Add batter to liners, filling about 3/4 full. DO NOT OVERFILL. They will be misshapen and stick to the pan. Bang the pan on the counter to remove air bubbles. Very important or you will have giant holes in your cupcakes.
4. Bake for 10 - 15 minutes. Each oven is different so I suggest checking them at 10 minutes and determining how much longer by the look. When done, they will be golden brown and the cracks will be dry.
5. Cool on a wire rack.
Champagne Buttercream
3 & 1/4 cups powdered sugar
1 cup unsalted butter, at room temperature
1/2 teaspoon vanilla extract
3 tablespoons champagne, at room temperature (I used a bit more for flavor)
1. With an electric mixer, beat together sugar and butter. Mix on low until well blended, and then on medium for another two minutes.
2. Add vanilla and champagne, beating on medium for another minute.
3. Pipe onto cooled cupcakes using your favorite pastry tip or just by filling a plastic bag and cutting of the corner to create your own pastry bag.
Before you look at the final product, remember that I did NOT follow these directions as I should have. Learn from my mistakes and have prettier cupcakes!
Angel Food Cupcakes with Blueberries
For the second Angel Food cupcake preparation, it is more in the presentation than changing the recipe. Angel Food and berries are a natural and classic combo however I wanted to serve them together without a frosting. Transporting frosted cupcakes is always a challenge so I came up with this simple yet attractive way as an alternative.
Angel Food mini cupcakes
Blueberries (or any other fruit you prefer)
Powdered sugar
toothpicks
1. Using a sifter or mesh strainer, dust the cupcakes with powdered sugar.
2. Thread three blueberries on to each toothpick and then place the free end of the toothpick into the cupcake.
I love this idea for summer as you can use whatever fruit is in season. For 4th of July you can alternate blueberries and strawberries or raspberries. It is perfect for picnics as you can assemble on site and they are temperature stable. Plus they are actually a pretty healthy dessert - Angel Food cake is fat free!
I do not profess to be a baker. Baking is science and while I dig science, I'm more of a mad scientist. This year I decided to make Champagne Cupcakes for the Oscars which was risky for sure. The recipes I found online were all 100% from scratch so I started to think how I could reconceptualize this idea. What is light like champagne? Angel Food! Do they make it in mix form? Yes! What else do you mix in? Water. Perfect! Champagne is my usual substitution for water anyway!
Instead of full sized cupcakes, I decided to make minis which had I used the entire box would have made about 70 - too many for the Oscars. Instead I made half the box and therefore used 1/2 the water/champagne. For the frosting, I found a great recipe for a Champagne Buttercream on The Curvy Carrot however I tried to make from memory (and with butter that wasn't quite room temperature) so my frosting didn't look quite right but it tasted GREAT. This is my common problem in baking - taste 10, looks 5. Plus I threw in some additional champagne so that might have also been part of the problem. Enough of the prologue, let's get to the recipe!
Champagne Cupcakes (Makes approximately 70 mini cupcakes if you use the entire box)
1 box Angel Food cake mix
1 1/4 cup champagne (or other sparkling wine)
1. Pre-heat oven to 375 degrees. Line your muffin pan with liners. Angel food cake is a little sticky so I would not recommend using silicone baking cups without liners.
2. Using an electric mixer, beat the mixture for 30 seconds at a low speed to moisten and then 1 minute at medium. DO NOT OVERBEAT. This will make it too airy.
3. Add batter to liners, filling about 3/4 full. DO NOT OVERFILL. They will be misshapen and stick to the pan. Bang the pan on the counter to remove air bubbles. Very important or you will have giant holes in your cupcakes.
4. Bake for 10 - 15 minutes. Each oven is different so I suggest checking them at 10 minutes and determining how much longer by the look. When done, they will be golden brown and the cracks will be dry.
5. Cool on a wire rack.
Champagne Buttercream
3 & 1/4 cups powdered sugar
1 cup unsalted butter, at room temperature
1/2 teaspoon vanilla extract
3 tablespoons champagne, at room temperature (I used a bit more for flavor)
1. With an electric mixer, beat together sugar and butter. Mix on low until well blended, and then on medium for another two minutes.
2. Add vanilla and champagne, beating on medium for another minute.
3. Pipe onto cooled cupcakes using your favorite pastry tip or just by filling a plastic bag and cutting of the corner to create your own pastry bag.
Before you look at the final product, remember that I did NOT follow these directions as I should have. Learn from my mistakes and have prettier cupcakes!
Angel Food Cupcakes with Blueberries
For the second Angel Food cupcake preparation, it is more in the presentation than changing the recipe. Angel Food and berries are a natural and classic combo however I wanted to serve them together without a frosting. Transporting frosted cupcakes is always a challenge so I came up with this simple yet attractive way as an alternative.
Angel Food mini cupcakes
Blueberries (or any other fruit you prefer)
Powdered sugar
toothpicks
1. Using a sifter or mesh strainer, dust the cupcakes with powdered sugar.
2. Thread three blueberries on to each toothpick and then place the free end of the toothpick into the cupcake.
I love this idea for summer as you can use whatever fruit is in season. For 4th of July you can alternate blueberries and strawberries or raspberries. It is perfect for picnics as you can assemble on site and they are temperature stable. Plus they are actually a pretty healthy dessert - Angel Food cake is fat free!
Labels:
4th of july,
angel food,
berries,
blueberry,
buttercream,
cake mix,
champagne,
cooking light,
cupcakes,
dessert,
fat free,
fruit,
healthy,
oscars,
picnic,
powdered sugar,
simple
Wednesday, February 5, 2014
Rice Krispie Treat Pops
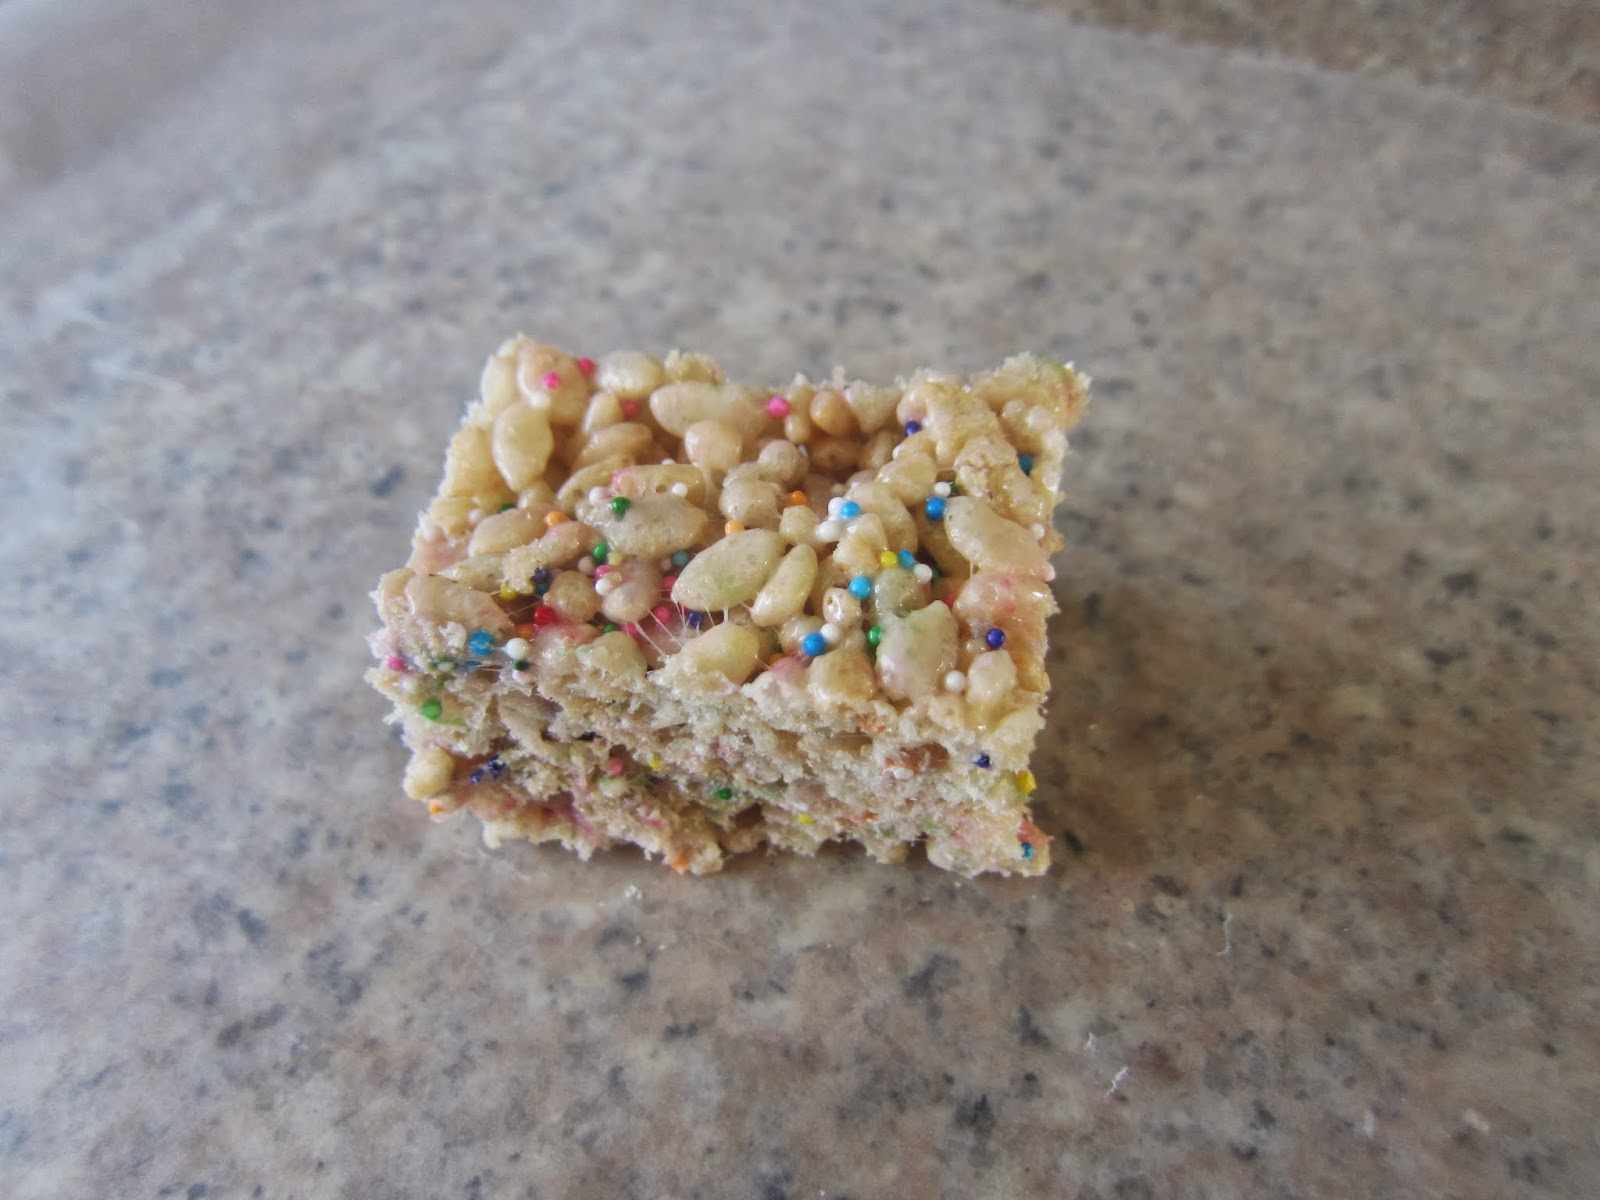
My birthday was last month and I decided I wanted to make somesort of treat to share with my friends. Since we were going to be at a bar, I wanted something that would be easy to eat - something on a stick. I am not much of a baker and did not want to spend a lot of time in the kitchen. I recalled seeing some photos on Pinterest of Rice Krispie Treat Pops - bingo!
After looking at several recipes, I really did not find what I was looking for in any one single recipe. So of course I put together the best parts along with some advice from Lisa at The Little Red Apron and my own ideas! My pops turned out great so hopefully this will help you in the creation of your own pops! I wanted to make sure to share these before Valentine's Day for all of you parents that are looking for a fun treat for a classroom party. What I love about this recipe is that it is completely adaptable for any holiday or occasion just by do any of the following:
Rice Krispie Treat Pops
4 tablespoons butter or margarine (Note: This is one tablespoon more than Kellogg's recommends.)
1 10 oz package of fresh marshmallows
6 cups Rice Krispie cereal (Note: There is now a gluten free version and I have been told it tastes the same.)
1 teaspoon vanilla or almond extract, optional
sprinkles, optional
Melting chocolate
1. In a large saucepan, melt the butter over low heat. Add marshmallows and stir until completely melted. Add optional extract for a flavor boost (I used vanilla). This is also when optional food coloring should be added. Remove from heat.
2. Slowly add cereal to marshmallow mixture. Sprinkles should be added with cereal - I like a lot of sprinkles so add to your liking. Do not add sprinkles to measured cereal as they will sift to the bottom and will be a challenge to mix evenly. I recommend adding half the cereal and some sprinkles to start. Then keep adding both until all of the cereal is used and you have achieved your preferred level of sprinkle. I probably used just shy of a 1/4 of a cup of sprinkles.
3. Once thoroughly mixed, use a buttered spatula or wax paper to press into a 13 x 9 inch (or similar sized) pan that has been greased with cooking spray or butter.Traditionally you wouldn't want to push the mixture down too much as it can make for a dense treat. You want a dense treat for the pops. Make sure to build them up so that they are square enough to be a pop. You will likely not fill the pan.
4. Cool on the counter or pop into the fridge of freezer to speed the process along.
5. Cut into even squares no smaller than 2 x 2 inches. I did not measure exactly so mine are different sizes. If you want them to be uniform you will need to measure your pan and do some math. You will likely have some scraps on one end where it wasn't exactly the same height as the rest. This is the cook's treat. Enjoy while you finish the pops!
6. Melt the chocolate (I got mine at Michaels) in the microwave or a double boiler. I recommend the microwave as it makes clean up that much easier. However make sure you are using the type of chocolate that can be used in the microwave. If you use regular chocolate chips you run the risk of scorching the chocolate.
7. Dip a treat stick into the melted chocolate and then push through the shorter end of the treat until it is about halfway through. As the chocolate hardens it will help anchor the treat to the stick. I also recommend you wear an apron. As you can see by the photo below I did not.
8. Stick your pop in the melted chocolate. I find that the microwave chocolate is very thick so I used a mini spatula to help brush it up on the sides and also to make sure each pop wasn't TOO chocolaty. Place pop on a piece of wax paper to allow the chocolate to harden. If you want to add MORE sprinkles, this would be the time to do so before the chocolate cools.
9. Repeat for remaining pops and once they are cool place them in an air tight container. As with traditional treats, these are best the day they are made and should be consumed within two days.
I promise these treats will be a hit. One girl at my party ate four of them. Yes, four of them. Is it wrong that I want to make another batch of these right now? Have fun and be sure to let me know about any interesting combinations you create!!!
After looking at several recipes, I really did not find what I was looking for in any one single recipe. So of course I put together the best parts along with some advice from Lisa at The Little Red Apron and my own ideas! My pops turned out great so hopefully this will help you in the creation of your own pops! I wanted to make sure to share these before Valentine's Day for all of you parents that are looking for a fun treat for a classroom party. What I love about this recipe is that it is completely adaptable for any holiday or occasion just by do any of the following:
- Using different colors of chocolate
- Adding or subtracting sprinkles
- Changing the color and/or shape of sprinkles
- Adding a few drops of food coloring
- Using different sticks
- Mixing in other cereals
- Cutting shapes out of the treats
Rice Krispie Treat Pops
4 tablespoons butter or margarine (Note: This is one tablespoon more than Kellogg's recommends.)
1 10 oz package of fresh marshmallows
6 cups Rice Krispie cereal (Note: There is now a gluten free version and I have been told it tastes the same.)
1 teaspoon vanilla or almond extract, optional
sprinkles, optional
Melting chocolate
1. In a large saucepan, melt the butter over low heat. Add marshmallows and stir until completely melted. Add optional extract for a flavor boost (I used vanilla). This is also when optional food coloring should be added. Remove from heat.
2. Slowly add cereal to marshmallow mixture. Sprinkles should be added with cereal - I like a lot of sprinkles so add to your liking. Do not add sprinkles to measured cereal as they will sift to the bottom and will be a challenge to mix evenly. I recommend adding half the cereal and some sprinkles to start. Then keep adding both until all of the cereal is used and you have achieved your preferred level of sprinkle. I probably used just shy of a 1/4 of a cup of sprinkles.
3. Once thoroughly mixed, use a buttered spatula or wax paper to press into a 13 x 9 inch (or similar sized) pan that has been greased with cooking spray or butter.Traditionally you wouldn't want to push the mixture down too much as it can make for a dense treat. You want a dense treat for the pops. Make sure to build them up so that they are square enough to be a pop. You will likely not fill the pan.
4. Cool on the counter or pop into the fridge of freezer to speed the process along.
5. Cut into even squares no smaller than 2 x 2 inches. I did not measure exactly so mine are different sizes. If you want them to be uniform you will need to measure your pan and do some math. You will likely have some scraps on one end where it wasn't exactly the same height as the rest. This is the cook's treat. Enjoy while you finish the pops!
6. Melt the chocolate (I got mine at Michaels) in the microwave or a double boiler. I recommend the microwave as it makes clean up that much easier. However make sure you are using the type of chocolate that can be used in the microwave. If you use regular chocolate chips you run the risk of scorching the chocolate.
7. Dip a treat stick into the melted chocolate and then push through the shorter end of the treat until it is about halfway through. As the chocolate hardens it will help anchor the treat to the stick. I also recommend you wear an apron. As you can see by the photo below I did not.
9. Repeat for remaining pops and once they are cool place them in an air tight container. As with traditional treats, these are best the day they are made and should be consumed within two days.
I promise these treats will be a hit. One girl at my party ate four of them. Yes, four of them. Is it wrong that I want to make another batch of these right now? Have fun and be sure to let me know about any interesting combinations you create!!!
Labels:
birthday,
cake,
cereal,
chocolate,
choose your own adventure,
classroom,
dessert,
funfetti,
holiday,
marshmallow,
michaels,
pinterest,
pops,
rice krispies,
sprinkles,
treat,
valentine's
Thursday, January 30, 2014
Super Bowl Sunday!!!!
Growing up I was not a fan of the Super Bowl. Despite being a cheerleader for a few years, I just could never get into the game. Then in college (and for some years after) the Super Bowl conflicted with my birthday - some years being the same day. That is not the best way to turn me into a fan! Finally the NFL wised up and pushed it back a week. Now I can enjoy my birthday weekend AND top off two months of gluttony with a big greasy finish.
Of course you don't have to go crazy on the calories for the Super Bowl. My contribution to the festivities in 2012 was a wonderful Jalapeno Popper Dip. I found the recipe on Pinterest and then changed a few ingredients to lighten it up. It was delicious!
Last year's dish was a take on the classic sliders and the calorie content was not as closely monitored. If you are hosting a large party, this particular dish is great because it stays warm in the slow cooker so people can help themselves!
Cheeseburger Bites
From Pillsbury Fast Slow Cooker Cookbook
This recipe includes my changes. One the major changes was that I doubled the recipe. The existing recipe only called for 1 lb of meat for 24 burger bites. This was just over a tablespoon per bite. I couldn't imagine anyone (especially guys) that would use so little! I also changed the cooking time thanks to the reviews on the website. 3 to 4 hours sounded crazy!
Bites
2 lb lean (at least 80% - I used 90 or 95% lean) ground beef
4 tablespoons ketchup
4 teaspoons instant minced onion (I didn't have minced onion so I finely chopped some onion and sauteed it before adding the meat.)
2 teaspoons yellow mustard
16 oz (2 blocks) cheddar cheese, or whatever cheese you like (the recipe called for American and I used 1 block of cheddar and 1 Monterey Jack), cut into 2 inch cubes
24 miniature burger buns
Toppings
Dill pickle chips
Sliced plum (Roma) tomatoes
Shredded lettuce (I used butter lettuce from a bag of salad.)
Additional ketchup and mustard
Other toppings you enjoy - I also provided relish, sauteed onions, and mayo.
1. In 10 inch skillet, cook beef over medium-high heat 5 to 7 minutes, stirring frequently, until thoroughly cooked; drain. Stir in ketchup, onion (unless you cooked fresh onion with the meat), and mustard.
2. Spray 3 1/2 to 4 quart slow cooker with cooking spray. Spoon beef mixture into slow cooker. Top with cheese.
3. Cover; cook on Low heat setting for 1 - 2 hours. Check at one hour to see if the cheese is melted. It may still look "cubed" but if you start to stir it the cubes fall away. I found that mine was ready in a little over an hour. With occasional stirring, this dish will hold on Low heat for several hours. Eventually I did turn off the slow cooker and with the lid on it stayed warm. It can burn if left on for too long.
4. Serve with the buns and toppings. Either assemble yourself or create a buffet for guests to top as they desire.
Looking for some more great recipes for the big game? Thrillist posted some great recipes earlier today. You can find them here.
So now that you have your food squared away, you need to think decor. Here are a few easy ways to dress up your Super Bowl party.
Free Signage
There are a number of free Super Bowl printables available online. You can do a simple search via search engine or Pinterest. This set from A to Zebra Celebrations is both simple and cute. Here is a sample of what you will find.
Make Easy Signage
I made this little sign to fit the Tolsby frame from IKEA. A simple font was used so that anyone attending the party could make one for their dish. Just pulled the Super Bowl logo online and added a border and a text box in Word. Super simple!
Double Duty Decor
Get this great cylinder set from IKEA and fill with a variety of items including football shaped chocolates and plastic football or helmet rings. Guests can snack on the chocolate and wear the rings!
Hope you have a great Super Bowl Sunday and that you win your score square! If you have some favorite dishes for the Super Bowl, be sure to share them below!
Of course you don't have to go crazy on the calories for the Super Bowl. My contribution to the festivities in 2012 was a wonderful Jalapeno Popper Dip. I found the recipe on Pinterest and then changed a few ingredients to lighten it up. It was delicious!
Last year's dish was a take on the classic sliders and the calorie content was not as closely monitored. If you are hosting a large party, this particular dish is great because it stays warm in the slow cooker so people can help themselves!
Cheeseburger Bites
From Pillsbury Fast Slow Cooker Cookbook
This recipe includes my changes. One the major changes was that I doubled the recipe. The existing recipe only called for 1 lb of meat for 24 burger bites. This was just over a tablespoon per bite. I couldn't imagine anyone (especially guys) that would use so little! I also changed the cooking time thanks to the reviews on the website. 3 to 4 hours sounded crazy!
Bites
2 lb lean (at least 80% - I used 90 or 95% lean) ground beef
4 tablespoons ketchup
4 teaspoons instant minced onion (I didn't have minced onion so I finely chopped some onion and sauteed it before adding the meat.)
2 teaspoons yellow mustard
16 oz (2 blocks) cheddar cheese, or whatever cheese you like (the recipe called for American and I used 1 block of cheddar and 1 Monterey Jack), cut into 2 inch cubes
24 miniature burger buns
Toppings
Dill pickle chips
Sliced plum (Roma) tomatoes
Shredded lettuce (I used butter lettuce from a bag of salad.)
Additional ketchup and mustard
Other toppings you enjoy - I also provided relish, sauteed onions, and mayo.
1. In 10 inch skillet, cook beef over medium-high heat 5 to 7 minutes, stirring frequently, until thoroughly cooked; drain. Stir in ketchup, onion (unless you cooked fresh onion with the meat), and mustard.
2. Spray 3 1/2 to 4 quart slow cooker with cooking spray. Spoon beef mixture into slow cooker. Top with cheese.
3. Cover; cook on Low heat setting for 1 - 2 hours. Check at one hour to see if the cheese is melted. It may still look "cubed" but if you start to stir it the cubes fall away. I found that mine was ready in a little over an hour. With occasional stirring, this dish will hold on Low heat for several hours. Eventually I did turn off the slow cooker and with the lid on it stayed warm. It can burn if left on for too long.
4. Serve with the buns and toppings. Either assemble yourself or create a buffet for guests to top as they desire.
Photo courtesy of Pillsbury as I forgot to take one.
Looking for some more great recipes for the big game? Thrillist posted some great recipes earlier today. You can find them here.
So now that you have your food squared away, you need to think decor. Here are a few easy ways to dress up your Super Bowl party.
Free Signage
There are a number of free Super Bowl printables available online. You can do a simple search via search engine or Pinterest. This set from A to Zebra Celebrations is both simple and cute. Here is a sample of what you will find.
Make Easy Signage
I made this little sign to fit the Tolsby frame from IKEA. A simple font was used so that anyone attending the party could make one for their dish. Just pulled the Super Bowl logo online and added a border and a text box in Word. Super simple!
Double Duty Decor
Get this great cylinder set from IKEA and fill with a variety of items including football shaped chocolates and plastic football or helmet rings. Guests can snack on the chocolate and wear the rings!
Hope you have a great Super Bowl Sunday and that you win your score square! If you have some favorite dishes for the Super Bowl, be sure to share them below!
Labels:
broncos,
cheese,
cheeseburger,
chocolate,
decor,
dip,
football,
ikea,
jalapeno popper,
mini burgers,
pinterest,
printables,
seahawks,
signage,
super bowl,
vase
Wednesday, December 11, 2013
Simple (and Relatively Healthy) Recipes for the Holidays
With only a couple weeks until Christmas, I am looking at recipes and trying to figure out what delicious contributions I can make to my family's holiday meals. In the process I realized that I have a few recipes I could share with you might make your search a little easier!
Cocktail
Holiday Floats
Last month I shared a couple signature drinks I have made for previous Thanksgivings. This year I created "Thanksgiving Floats" which are easily rebranded "Holiday Floats". I used Martha Stewart's Everyday Food recipe for Cranberry & Apple Cider Sorbet for these floats. I followed the recipe as it was written with the exception of doubling the recipe. This meant it froze on a different timeline and even though I forgot about it in the freezer and mashed it late, it turned out wonderfully once I put it in the food processor. The flavor is quite strong but really mellows out once made into a float.
The assembly is quite simple. In addition to the sorbet you will need sparkling wine - I personally like Prosecco as it's not too dry or too sweet. Despite what my directions say in the photos below, I think the best way to assemble the floats is as follows:
1. Pour a small amount of sparkling wine in each glass. Allow the foam to subside.
2. Put 1 or 2 (depending on taste) small scoops of sorbet in the glass. I used a melon baller to get the right sized scoop for a champagne flute.
3. Slowly and carefully top with sparkling wine. The combination of the bubbly drink and the cold sorbet really causes it to foam up!
In order to keep the sorbet frozen, I took an ice bucket, filled it with ice, and then placed the bowl of sorbet on top. If you are hosting a party and want this drink to be self-serve, I would recommend doing something similar.
Appetizers
Tortellini Caprese Skewers
1 package whole wheat cheese tortellini
cherry tomatoes (I used Sweet 100s from my garden)
basil, cut or torn into skewer size pieces
Trader Joe's Balsamic Glaze
olive oil
coarse sea salt
1. Cook tortellini according to package instructions. Cool. If you don't have time to allow the tortellini to cool on their own, you can prepare an ice bath (ice & water) and plunge them for a quick cool down.
2. Assemble skewers using toothpicks sandwiching the basil between the tortellini and tomato. Be sure to skewer through the "meatiest" part of the tortellini and tomato for a sturdy appetizer.
3. Arrange dipping "sauces". Balsamic Glaze (can be substituted for a balsamic reduction) in one bowl, good quality olive oil in another, and coarse sea salt in another (or via a salt grinder) with small serving spoons. While I prefer to offer the selection of classic toppings, you could also just drizzle one or the other over a platter of skewers.
Note - I actually originally made these for a picnic at the end of summer but the colors and simplicity make them a perfect appetizer for the holidays!
Cocktail
Holiday Floats
Last month I shared a couple signature drinks I have made for previous Thanksgivings. This year I created "Thanksgiving Floats" which are easily rebranded "Holiday Floats". I used Martha Stewart's Everyday Food recipe for Cranberry & Apple Cider Sorbet for these floats. I followed the recipe as it was written with the exception of doubling the recipe. This meant it froze on a different timeline and even though I forgot about it in the freezer and mashed it late, it turned out wonderfully once I put it in the food processor. The flavor is quite strong but really mellows out once made into a float.
The assembly is quite simple. In addition to the sorbet you will need sparkling wine - I personally like Prosecco as it's not too dry or too sweet. Despite what my directions say in the photos below, I think the best way to assemble the floats is as follows:
1. Pour a small amount of sparkling wine in each glass. Allow the foam to subside.
2. Put 1 or 2 (depending on taste) small scoops of sorbet in the glass. I used a melon baller to get the right sized scoop for a champagne flute.
3. Slowly and carefully top with sparkling wine. The combination of the bubbly drink and the cold sorbet really causes it to foam up!
In order to keep the sorbet frozen, I took an ice bucket, filled it with ice, and then placed the bowl of sorbet on top. If you are hosting a party and want this drink to be self-serve, I would recommend doing something similar.
Appetizers
Tortellini Caprese Skewers
1 package whole wheat cheese tortellini
cherry tomatoes (I used Sweet 100s from my garden)
basil, cut or torn into skewer size pieces
Trader Joe's Balsamic Glaze
olive oil
coarse sea salt
1. Cook tortellini according to package instructions. Cool. If you don't have time to allow the tortellini to cool on their own, you can prepare an ice bath (ice & water) and plunge them for a quick cool down.
2. Assemble skewers using toothpicks sandwiching the basil between the tortellini and tomato. Be sure to skewer through the "meatiest" part of the tortellini and tomato for a sturdy appetizer.
3. Arrange dipping "sauces". Balsamic Glaze (can be substituted for a balsamic reduction) in one bowl, good quality olive oil in another, and coarse sea salt in another (or via a salt grinder) with small serving spoons. While I prefer to offer the selection of classic toppings, you could also just drizzle one or the other over a platter of skewers.
Note - I actually originally made these for a picnic at the end of summer but the colors and simplicity make them a perfect appetizer for the holidays!
Caramelized Onion, Gruyere and Bacon Spread
I made this delicious spread last year for Christmas and it was a huge hit! I found the recipe on the Cooking Light website. At only 100 calories for 3 tablespoons, you can feel free to indulge! The creamy cheese, caramelization of the onions and subtle saltiness of the bacon makes this dip seem much more decadent than it actually is.
Something to note - you have to cut up A LOT of onions for this recipe (this is what makes it so low cal despite all of the other delicious ingredients). If you are sensitive to the aroma, you may want to wear eye covering. I had to keep stopping because I couldn't stop crying! Also, I prepped the entire spread the day before with the exception of adding the final layer of cheese. If you are trying to get a number of items ready, just having to pop this in the oven is a big time saver. I served this spread with Trader Joe's Rye Crisps and crostinis.
Photo courtesy of Cooking Light
Side Dish/Salad
Rosemary Mashed Sweet Potatoes with Shallots
This was another great find from Cooking Light! Our main dish last Christmas was a pork roast and these potatoes went wonderfully. I think this dish would go equally well with any number of proteins as the shallots and rosemary really help tame the sweetness of the potatoes.
Photo courtesy of Cooking Light
Christmas Spinach Salad
This is a salad that was inspired by one my friend brought to an event several years ago. I just love the contrast of the pomegranate seeds against the spinach leaves. Unfortunately no photos of this one but I promise it is very simple.
1 bag of pre-washed spinach leaves
feta cheese, crumbled (I like the fat free or reduced fat.)
fresh pomegranate seeds (dried can be substituted but it isn't as good)
walnuts, chopped & lightly toasted
balsamic salad dressing
1. Fill a large bowl with spinach leaves and top with the feta cheese, pomegranate seeds, and walnuts - use your best judgement as to proportions. You want to garnish the salad - not have the toppings in equal proportion to the spinach.
2. Just before serving, toss with dressing or allow everyone to dress their own salads.
I hope these recipes have given you a place to start when planning your holiday meals and gatherings. The options really are endless! I am a crazy Pin-aholic so please check out my Pinterest page for lots more recipe ideas!
Labels:
apple,
bacon,
balsamic,
caprese,
caramelized onion,
cheese,
cider,
cranberry,
feta,
float,
gruyere,
rosemary,
shallots,
skewers,
sparkling wine,
spinach,
sweet potatoes,
tortellini,
trader joes,
walnut
Wednesday, December 4, 2013
On the Tart Side's Holiday Gift Guide
Everyone and their brother is doing a holiday gift guide this time of year so I figured I would throw one more in the mix! While I still stand by the advice from my previous gift giving entry - You Shouldn't Have! - A Guide to Gifting - here are some creative items for everyone on your list!
Ladies first....
Gentle Reminders Pencils - Even though we ladies strive to embody all of these attributes, it never hurts to have a little reminder at our fingertips! These cute pencils come in a variety of colors (though I think the gold on white is very chic) and at just $12 a set are perfect for small gifts for co-workers or stocking stuffers. In addition Amanda Catherine Designs, the Etsy shop that sells the pencils, donates a portion of their proceeds to end child sex slavery & exploitation. These pencils are not quite the "write" sentiment? There are several other fabulous designs as well as a number of cute prints for your walls.
Ladies first....
Gentle Reminders Pencils - Even though we ladies strive to embody all of these attributes, it never hurts to have a little reminder at our fingertips! These cute pencils come in a variety of colors (though I think the gold on white is very chic) and at just $12 a set are perfect for small gifts for co-workers or stocking stuffers. In addition Amanda Catherine Designs, the Etsy shop that sells the pencils, donates a portion of their proceeds to end child sex slavery & exploitation. These pencils are not quite the "write" sentiment? There are several other fabulous designs as well as a number of cute prints for your walls.
Happy Chic by Jonathan Adler Gold Chevron Picture Frame - As a huge Jonathan Adler fan, I was thrilled when he started designing a line for JCPenney! While MY wish list has a number of items from his regular store, you can't go wrong with this adorable $15 frame. The neutral tones of gold & white give it flexibility to work with a variety of different decors. Other stylish frames are priced similarly so you can bring that Jonathan Adler look to your home for a fraction of the cost! Also, right now all of the holiday themed items are on sale! Very cute stockings to dress up your mantel!
Absolutely Fabulous: Absolutely All of It - Nothing says friendship more than crazy Patsy & Edina from Absolutely Fabulous! This just released DVD box set includes every episode, every special and lots of extras. While at the higher end (currently approximately $143 on Amazon) it would make a very memorable gift. Don't forget a bottle of Stoli and some champagne sweetie darling!
And now for the Gentlemen....
Antonio Glasses Holder - I am a big fan of anything that makes boring more fun. Lose your shades frequently? Not anymore! What guy wouldn't want to see his glasses perched on top of a moustache? At only $6.99, it also can double as a conversation piece on your entry table. Is it practical? Is it art? It's both! Available at The Container Store.
Recycled Vinyl Record Bookends - Regardless if he uses these bookends to hold up his own vinyl collection or a bunch of encyclopedias, give his bookshelf a facelift! IKC Designs confirms that no viable records are harmed in the creation of these bookends so for $24 a set he can cozy his books up next to some vintage vinyl. One can only hope that such classics as Air Supply and Milli Vanilli end up in your order. These records are coming from my home state of Ohio so you never know what you might get!

Craft Beer Connect - Shopping for a craft beer lover? Give them the gift that keeps on giving with a membership to Craft Beer Connect! Memberships start at just $30 per shipment and you have several options depending on the types of beer you would like to gift/receive. Prefer to do a one time shipment? That is an option too - same options and prices but as single transaction. You can even select your beers if you want! Please read any shipment restrictions carefully as not all states allow the shipment of alcohol.
Don't forget the kiddos!
Fingernail Friends - I remember the year that Santa brought me my first nail polish. It was supposed to be kid friendly however I recall sitting in my parents' bathroom waiting FOREVER for it dry. Kids are not known for being great at the waiting game which is where this product comes in. Choose either Butterflies or Zoo Animals and have fabulous nails in seconds with these great stickers from The Container Store. At just $4.99 they make a great stocking stuffer!
Incog-Neato Moustaches - Movember might be over but kids will love playing with this fun selection of moustaches from The Land of Nod. Hours of make believe await for just $7.95!
What about a gift for the ENTIRE FAMILY?
Zoku Quick Pop Maker - Kids want popsicles, parents want to provide a healthy snack with minimal time and effort - enter the Zoku Quick Pop Maker. You simply store your pop maker (makes either one, two, or three pops simultaneously depending on model) in the freezer and when the popsicle mood strikes, simply fill with your favorite juice, chocolate almond milk, etc. In just seven minutes you will have fully formed popsicles! Each slot can make up to three pops before needing to be fully refrozen. The maker comes with instructions on how to make fancy layered pops if you want to get creative. The single pop maker starts at just $24.95 and is available directly through Zoku as well as Williams Sonoma; Amazon; Bed, Bath & Beyond among others.
Show your favorite Host or Hostess that they truly are the Mostest!
Innocent Bystander Pink Moscato - Last year I traveled to Australia and while there discovered this wonderful, light, sweet sparkling wine - Innocent Bystander Pink Moscato. While a traditional champagne is a safe choice, I think this particular wine is a very fun and festive option for a hostess gift. Rather than a champagne cork, the bottle is topped with a bottle cap which is very unique. In Australia they also serve this wine on draft at bars in fabulous beakers. K&L is selling this wine for just $10.99 a bottle so at this price you can pick up a case!
Journals from Kikki K - Kikki K is another discovery from my time down under - a Swedish themed stationary company based in Australia. Kikki K has the most amazing journals - not just a book with blank pages but one that helps take you on a journey. The two examples I included below are two of my personal favorites. The "A Sentence a Day Journal: Celebrate Today" is a three year journal where you write one sentence about your day each day. It is a wonderful way to reflect on the little things that make up the days of our life. Another favorite is the "Happiness Journal" which provides activities and places to write you monthly objectives to exploring your own happiness. I could go on and on so it is better to just take a moment and see for yourself (I bought my guestbook from this store - it is similar to this book). Prices vary and international shipping is free with orders of $150 or more.
Last but not least a fun item for your office gift exchange!
Misheard Lyrics Coaster Set - I just saw these coasters this week and thought they were just too fun! Coasters with commonly misheard lyrics are an automatic conversation starter - Did you ever think they were singing that? What lyrics did you realize you sang wrong for years? With a price of $20 they are the perfect price point for your gift exchange!
What is the best gift you've ever received? Any favorites for this year you are hoping to find under the tree? Happy Gifting!
Subscribe to:
Posts (Atom)

.jpg)